This guide assumes you have already imported your internal Year 11s or your Reception/ Year 7 parent csv, and that you've checked your template in the Communications area.
Year 12 (students)
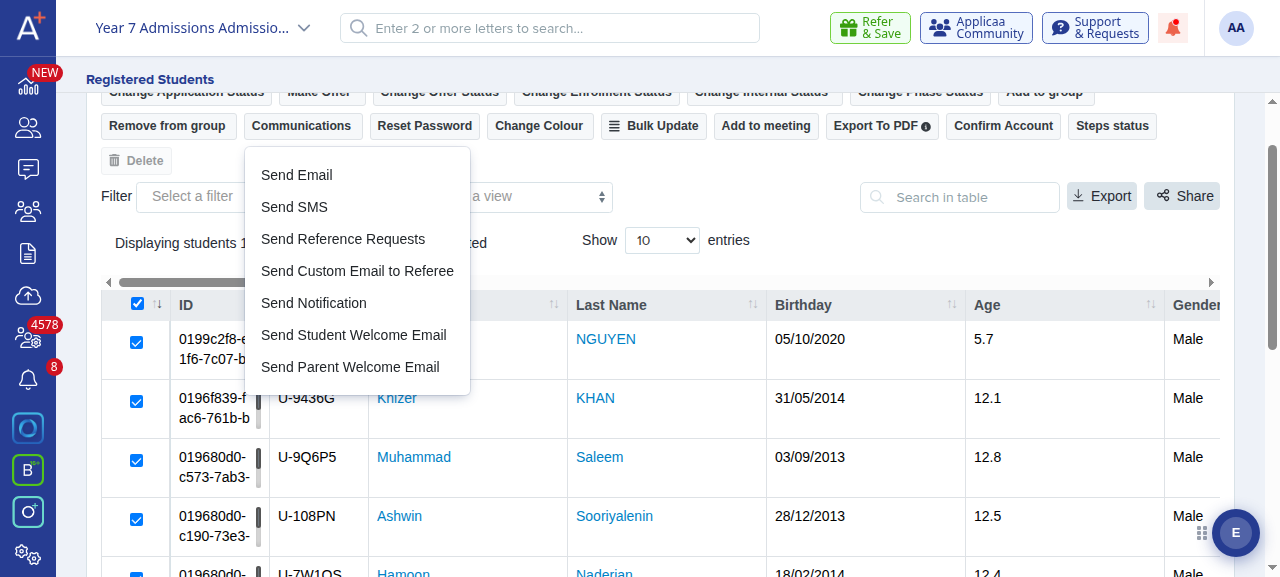
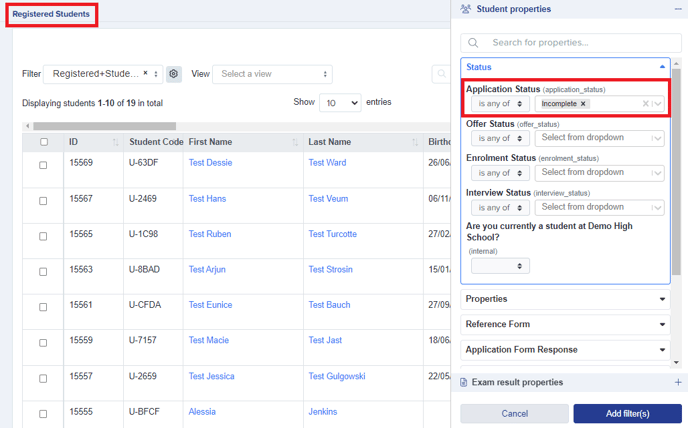
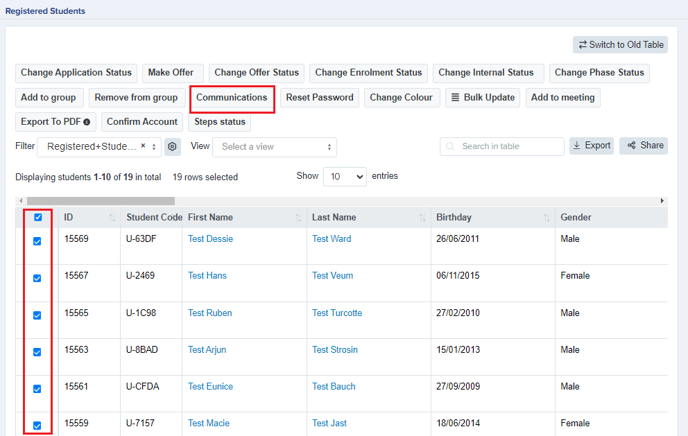
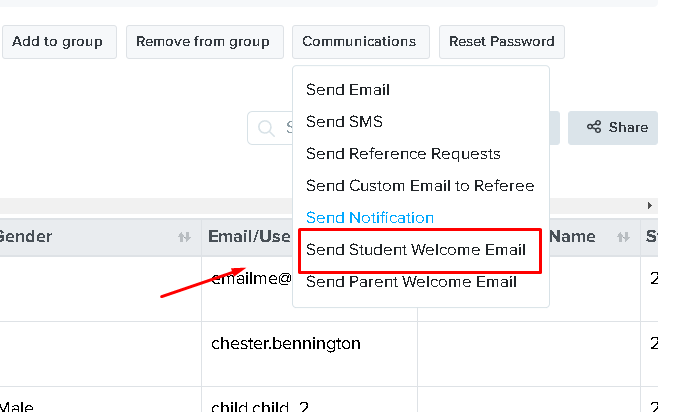
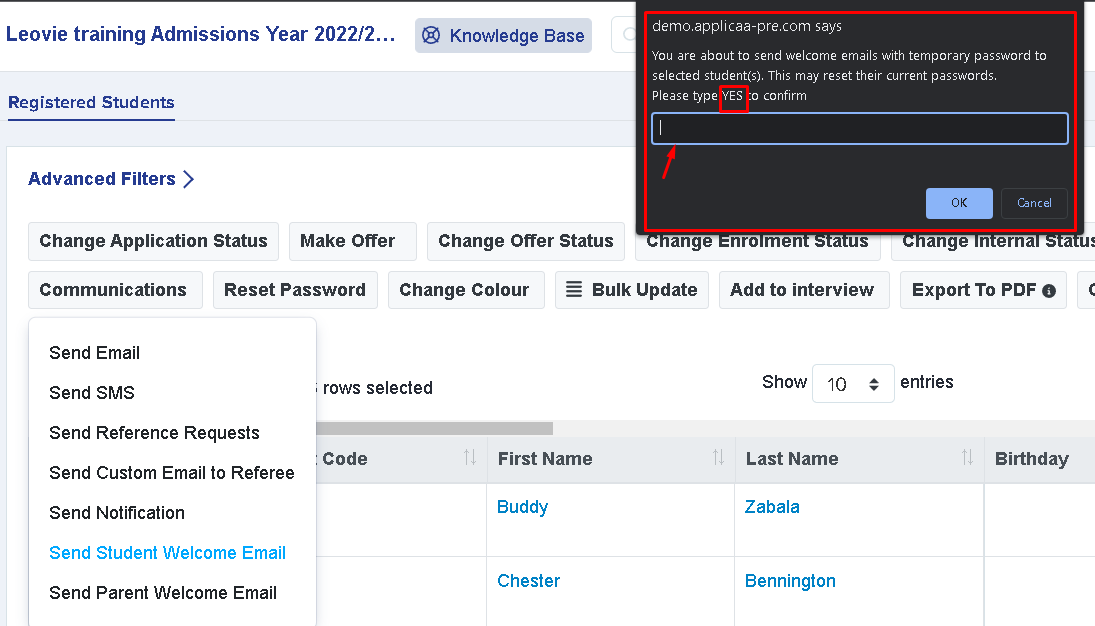
To send a welcome email, go to "Registered Students" and filter the list to show those with an "Incomplete" application status. Once you have the list, select all the students in the table below, click the "Communications" button, and then choose "Send Student Welcome Email." A pop-up will appear to confirm the action.
Year 7/ Primary (parents)
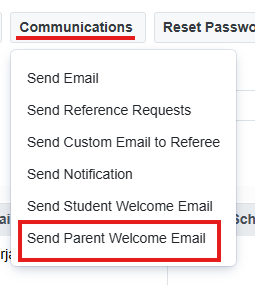
You may also follow the process provided on the steps above by selecting the names of the student then selecting the option "Send Parent Welcome Email" under the Communications button
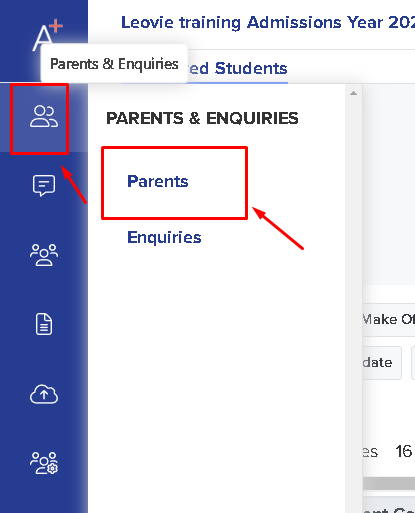
Alternatively, you can send a welcome email to parents, by going to Parents & Enquiries > Parents. The process is similar to sending a welcome email to students.
Select all parents from the list and click to 'Welcome Email' then 'Send' . A prompt message will appear to confirm the action.
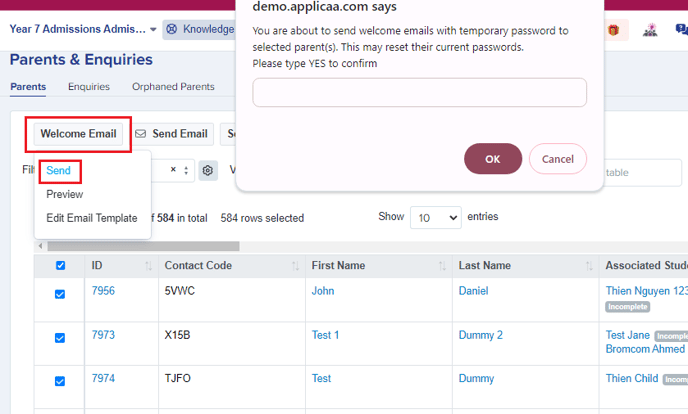
From here you also have the option to preview and edit the email template prior to sending it out.
What login details the welcome email contains
The welcome email gives each student their login details for your Admissions+ platform: the email address held on their profile, together with a temporary password. Students sign in with that email address.
Some students — most often younger year groups whose parents apply on their behalf — do not have an email address of their own. For these students the platform creates a username from their first and last name and a placeholder sign-in address, and they sign in with the username instead. You can see each student's login identifier in the "Email/Username" column on the Registered Students list.
What to do if a welcome email has no username
If a welcome email or welcome letter shows no username, the student almost always has their own email address — so their login is that email address and there is no separate username to display. Nothing is wrong: they sign in with the email address shown in the welcome email. A username is only created for students who have no email address of their own.
To check, open the student's profile from the Registered Students list and look at their email address, first name and last name.
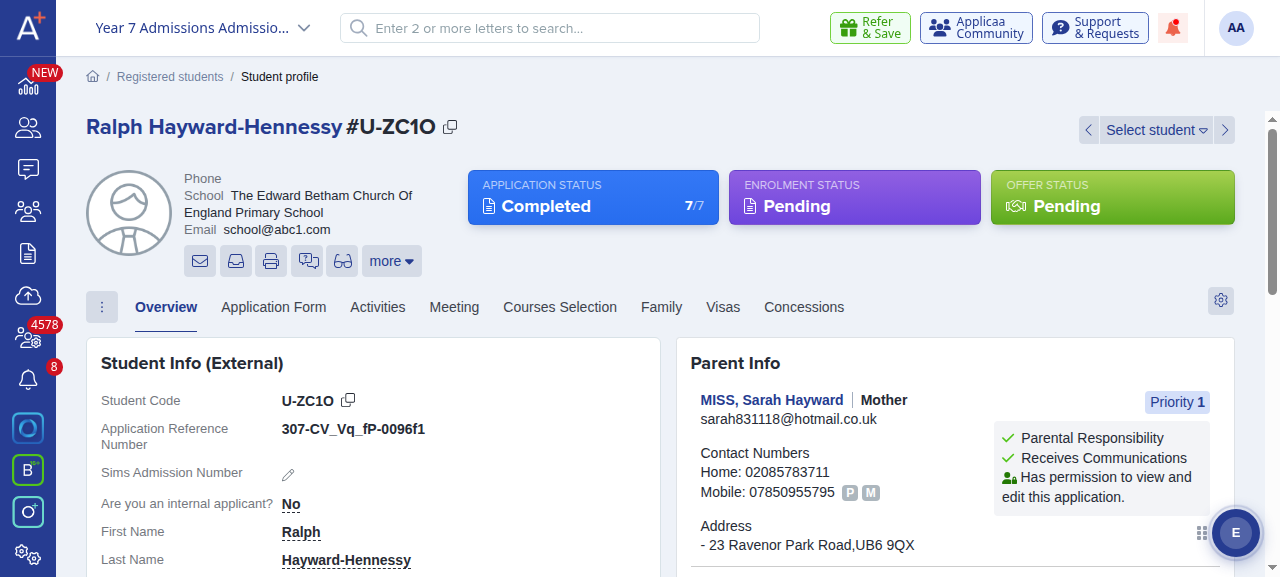
The username is generated from the student's first and last name, so it is only created once both of those are filled in. If a student who should have a username doesn't have one, make sure their first name, last name and email address are all complete on their profile, then re-send their welcome email. Select the student on the Registered Students list, click "Communications" and choose "Send Student Welcome Email".