
The offer system enables you to make offers to students online using a personalised message. Students can respond by accepting or declining the offer and the system will automatically track student responses
This guide is used to make sure that your template is correctly set up prior to sending the offers to your students.
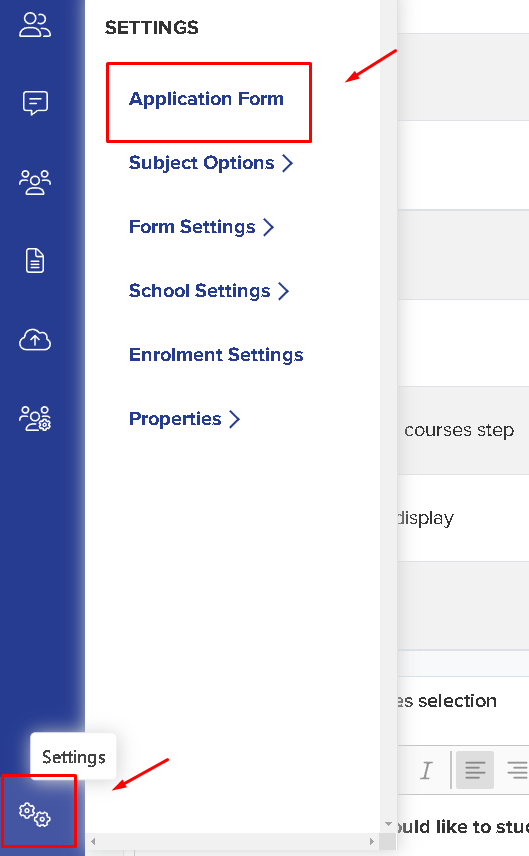
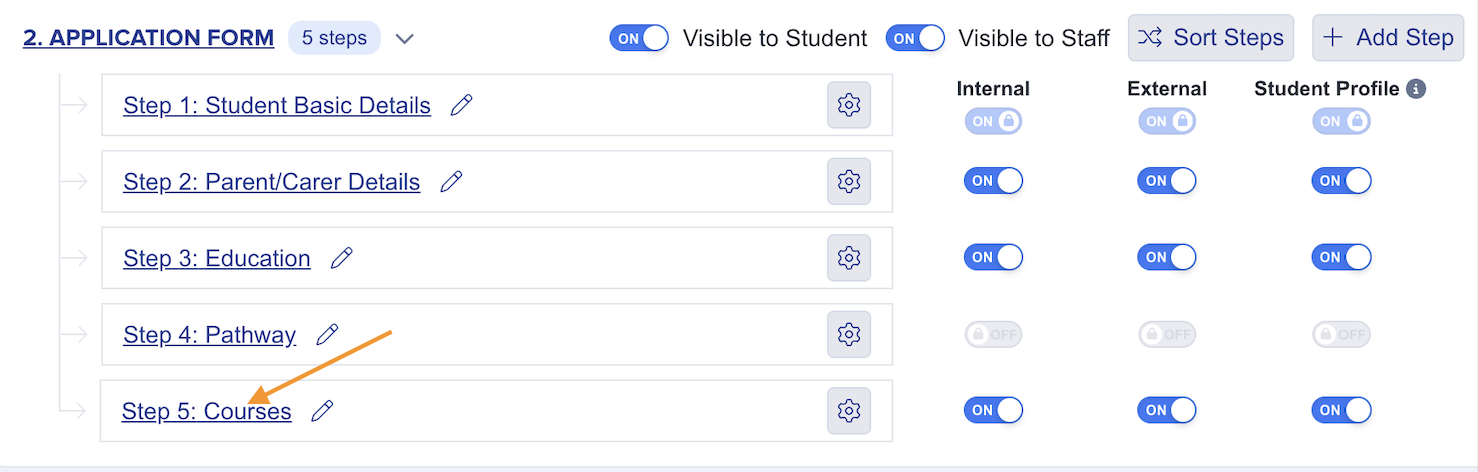
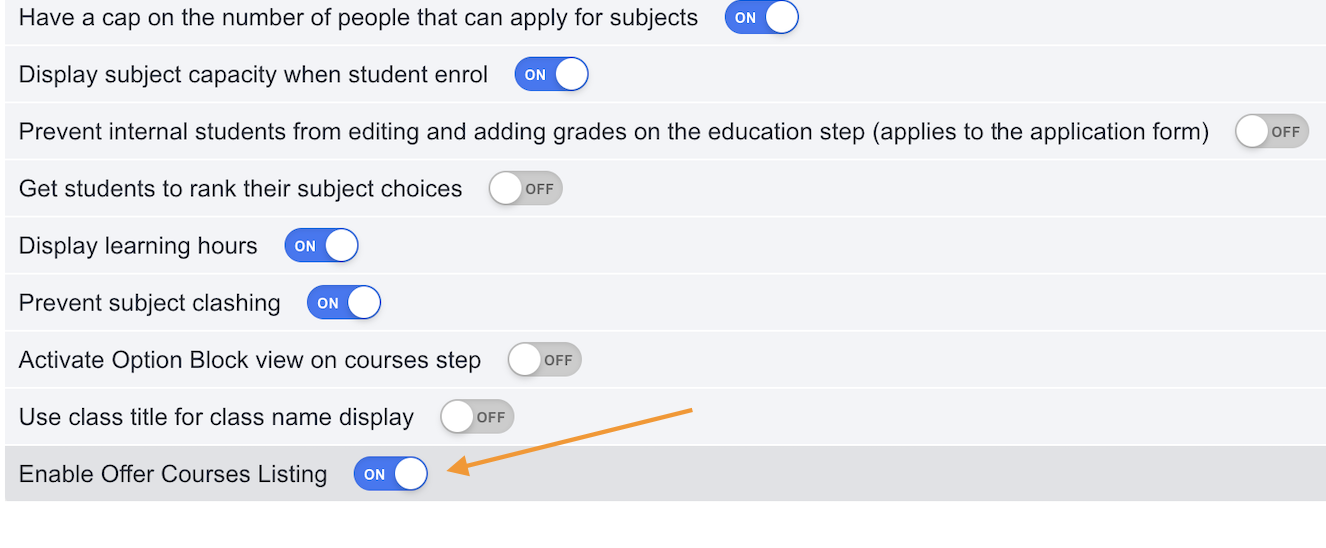
First, you need to make sure that your offer list is switched on if you are hoping to make subject-specific offers to applicants. To verify that, go to settings > application form and then go to Courses step and look for the 'Enable Offer Courses Listing' then switch that on.
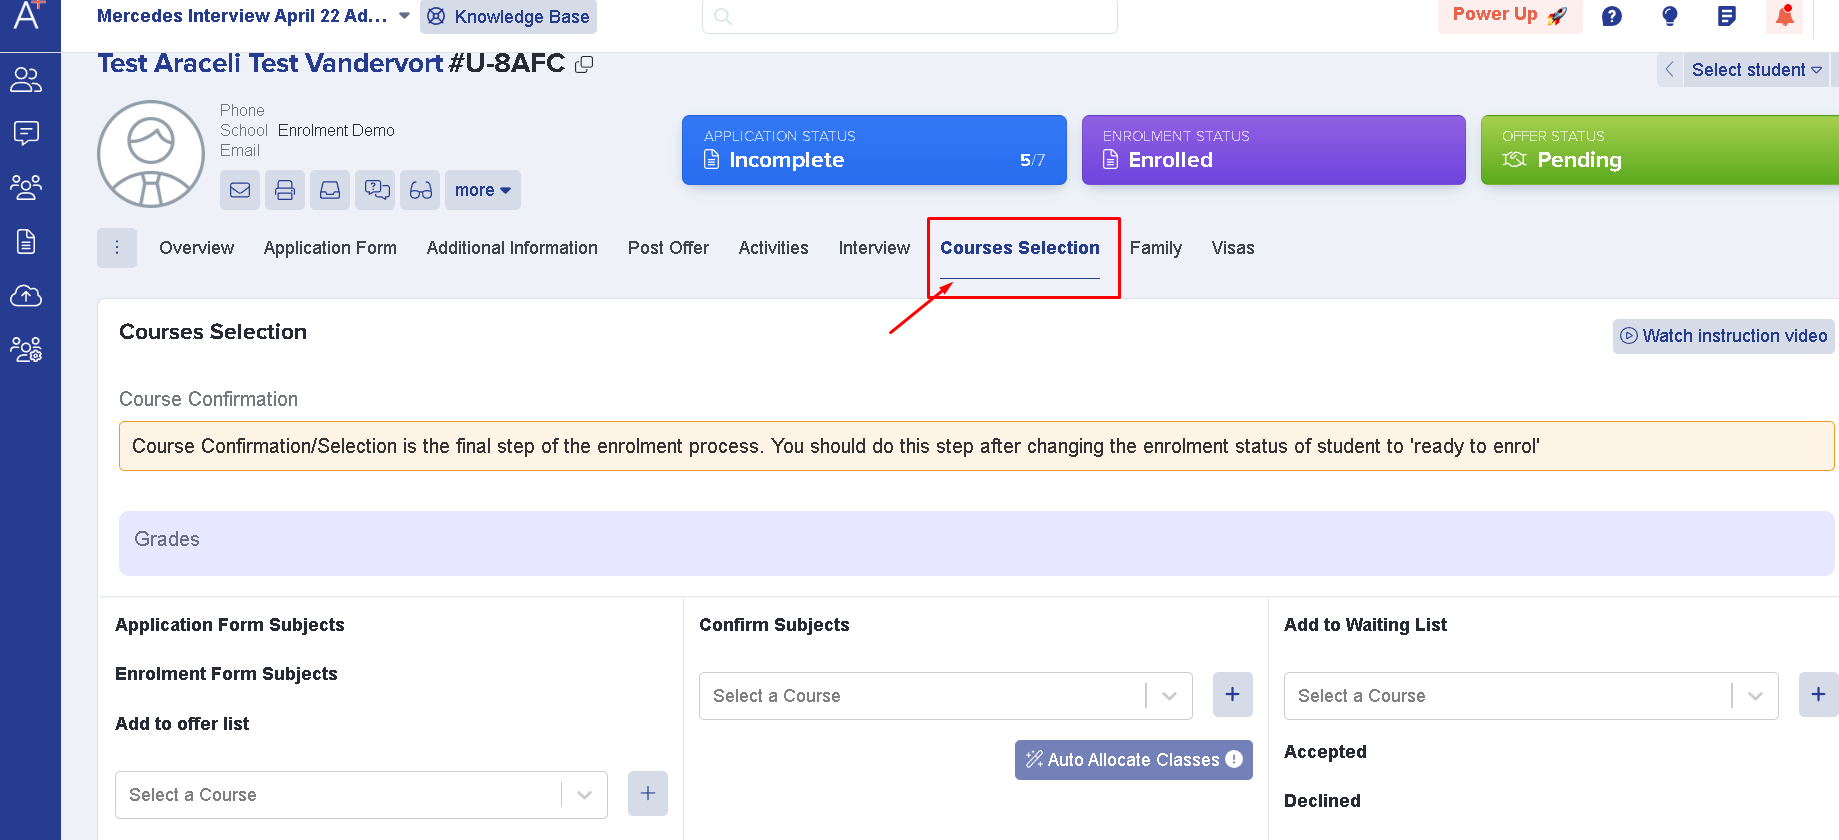
On a student's profile, click the 'Courses Selection' tab and look for 'Add to Offers list' button. From there, whichever courses you add into the offer list, the student will see on their offer email.
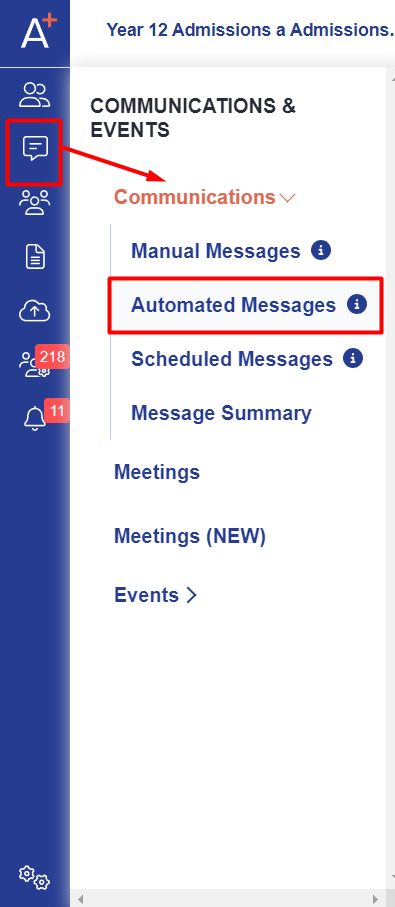
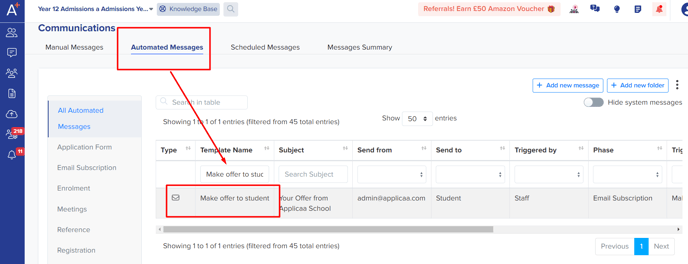
In the communications & events area, go to Automated messages area and look for 'Make offer to student' email template.
Note: You may access this guide on how to make an offer to a student, once you have completed the template customisation.
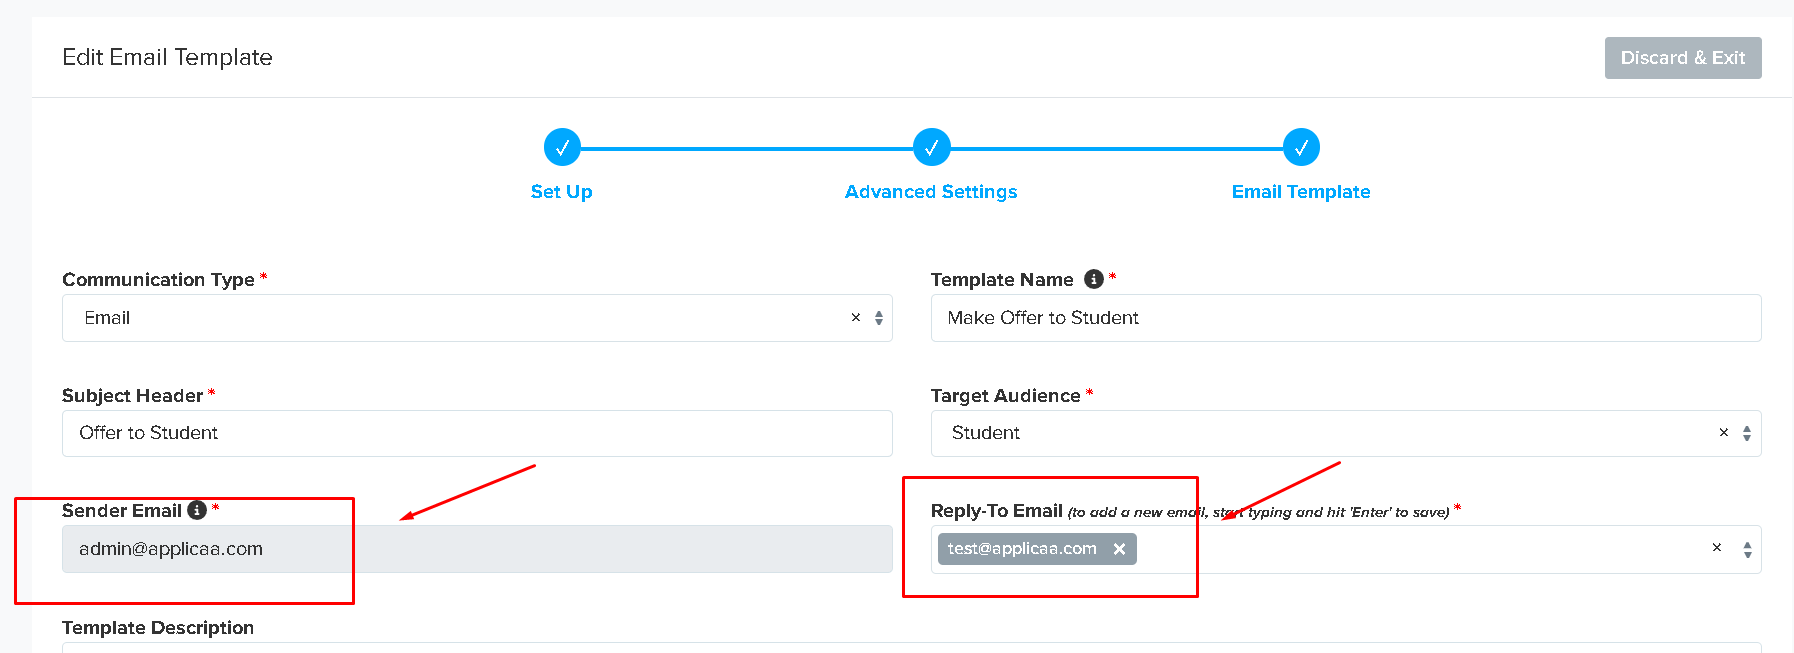
To edit the template, click on the pencil icon. You can change the Subject Header, Sender Email address (This is where your template will be sent from) & the Reply to email address (This is where the parents & students can send their replies). Once done, proceed to the next pages and proceed in checking the email content.
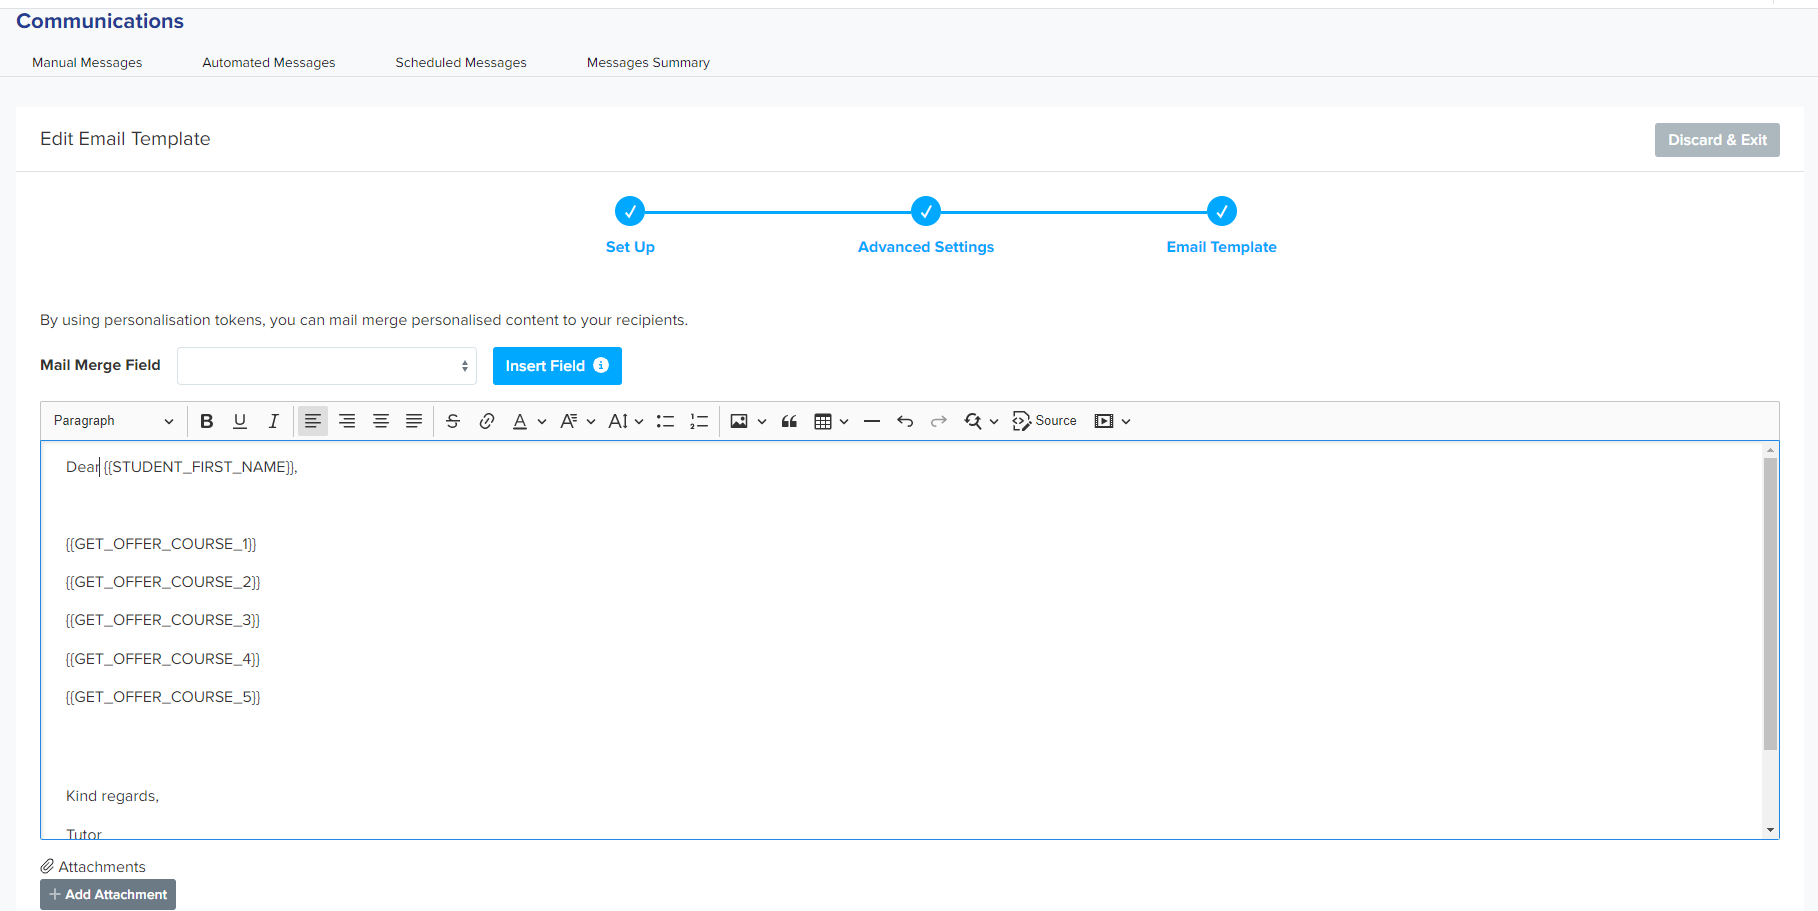
By using the mail merge fields the offered courses will pull through what you have entered on the 'offered subjects' in the courses area.
Do the offer template and your offers list stay in sync?
Yes. Your offer email template and each student's offers list are linked through the mail merge fields — the offered courses are not copied into the saved template. Every time you send an offer, the offered-courses mail merge fields pull that student's current offers list into their email, so each student receives their own offered subjects from the same template.
This means you can reload or reset the template to the default version at any time and it will still show each student their own offered courses, as long as the template keeps the offered-courses mail merge fields. If you change the courses on a student's offers list, the update is picked up automatically the next time an offer is generated for that student — you do not need to re-edit the template. If you remove the offered-courses mail merge fields from the template, the offered courses stop pulling through, so re-add them from the merge field list to restore the link.
Confirming a student's subjects
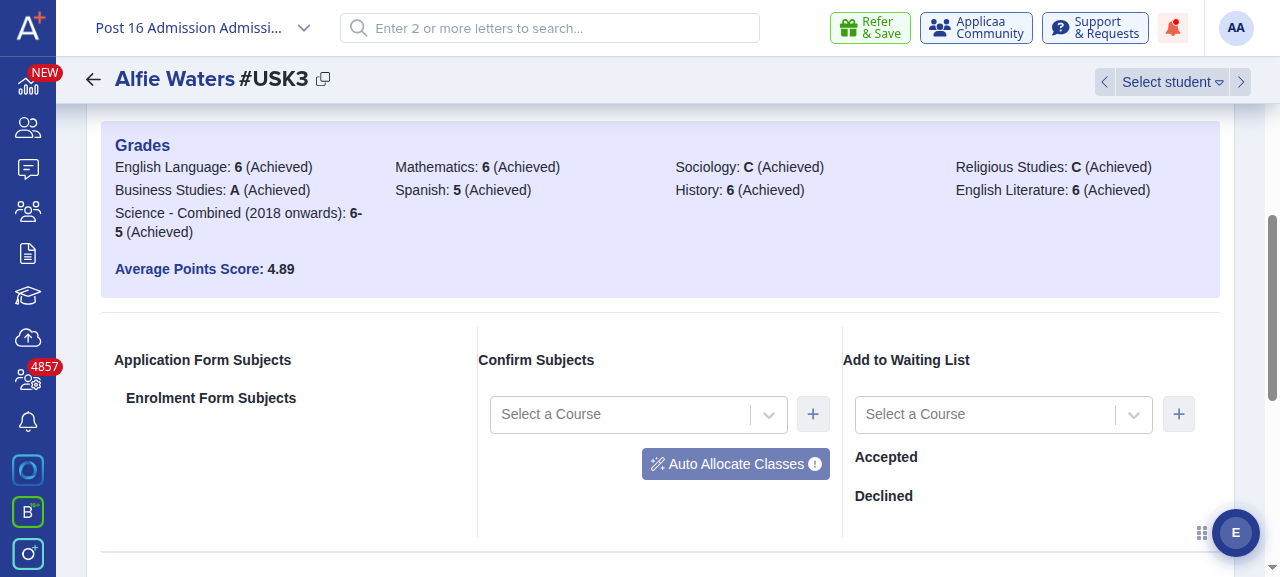
The offers list is only used to make the offer. Confirming a student's subjects is a separate, later step and is not done from the offers list. On the student's profile, open the Courses Selection tab to find the Course Confirmation panel.
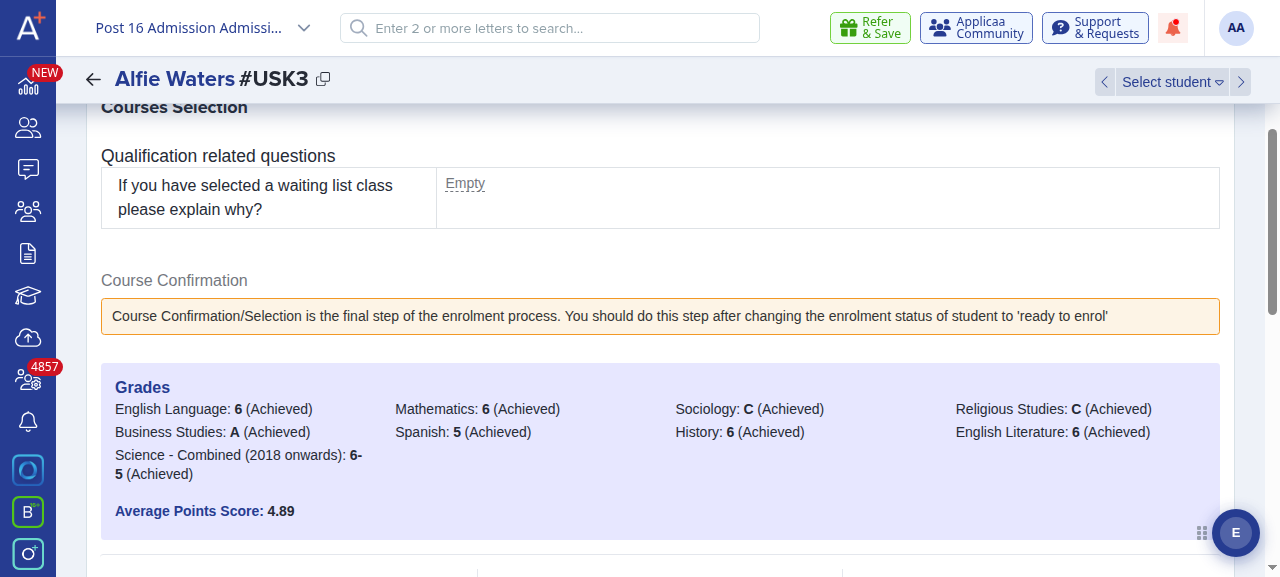
Course confirmation is the final step of the enrolment process. Confirm a student's subjects only after they have accepted their offer and you have set their enrolment status to Ready to Enrol.
Use the Confirm Subjects box to choose each course the student is confirmed for and add it. You can also move a course to the waiting list here if a subject is full.
Related articles
- Offer Courses Listing
- How to send offers
- How to Update Offer Status
- Which information and settings get copied when a new form is created?