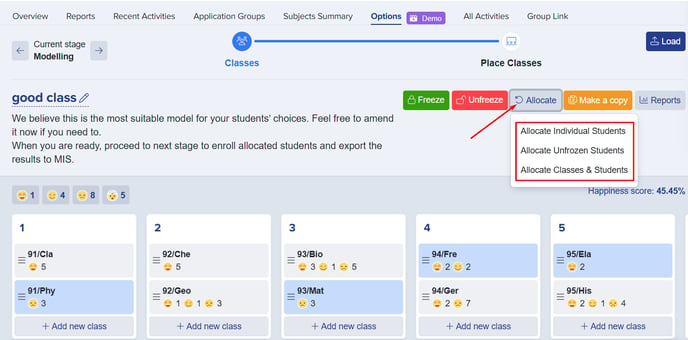
After allocating classes and students using the Allocate button, the system will generate a proposed model. You will then see the Happiness Report displayed at the top of the model, providing insights into student allocations.
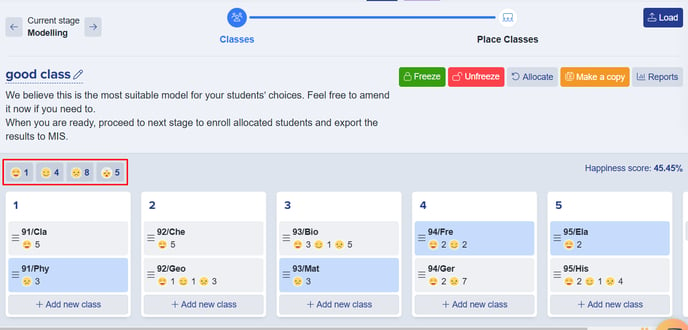
Clicking on the sad emoji will display a list of students who have to use subjects outside of their chosen options. Meanwhile, clicking on the fourth emoji will show students who have not been fully allocated to their selected subjects.
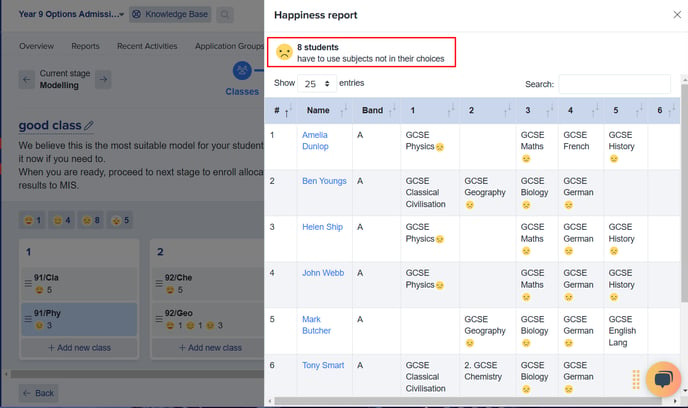
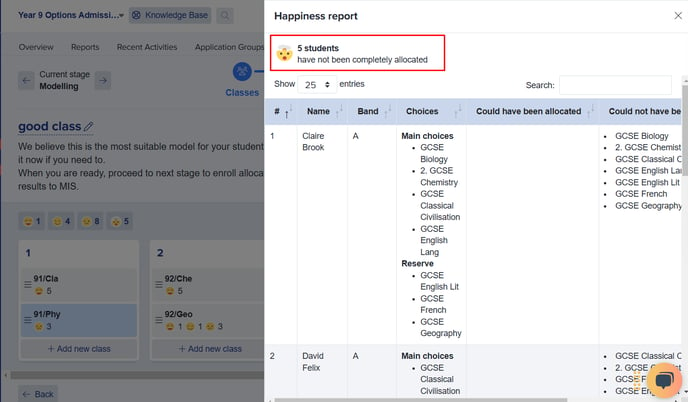
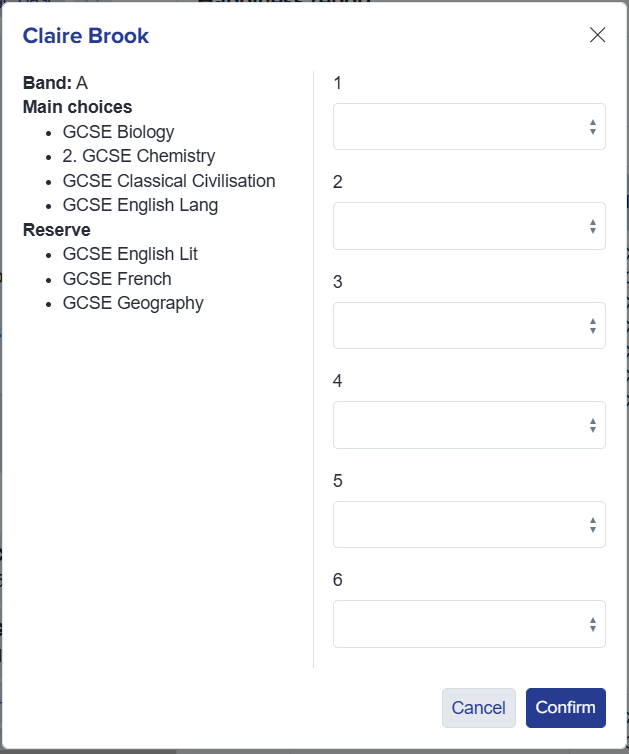
In the list displayed after clicking the sad emoji, selecting a student's name will give you the option to manually allocate them to classes. Simply click on the dropdown and select the class you want the student to be allocated to. Click 'Confirm' once done.
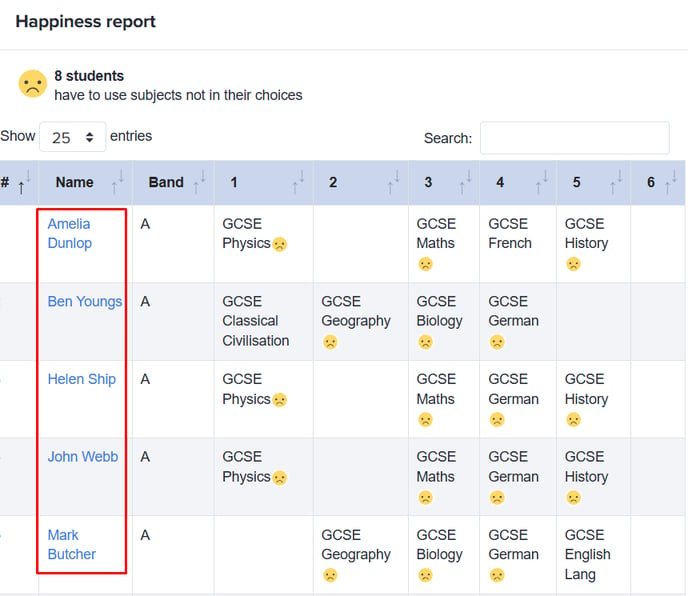
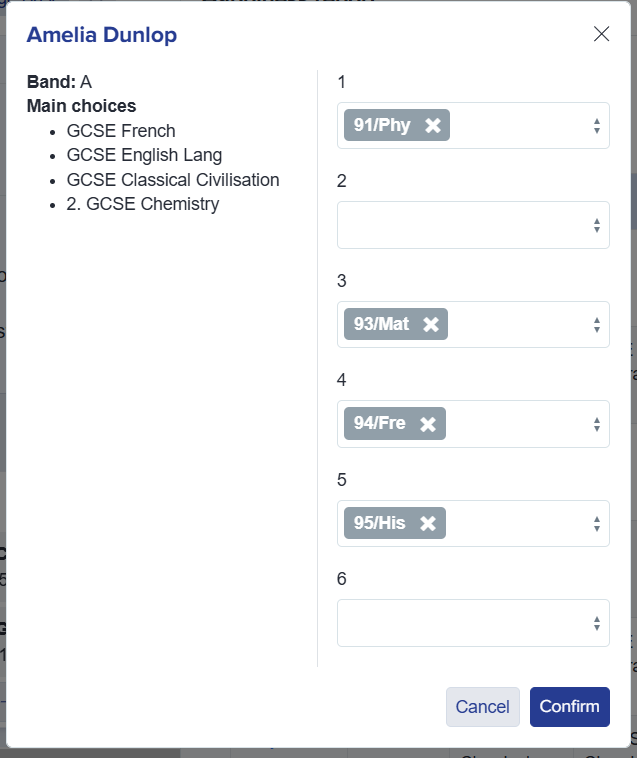
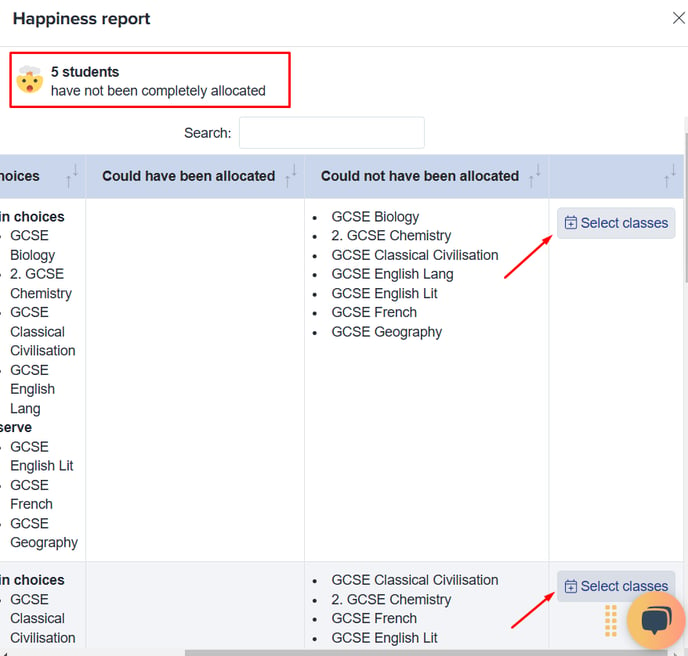
In the list displayed after clicking the last emoji, clicking on 'Select classes' will give you the option to manually allocate them to classes. Simply click on the dropdown and select the class you want the student to be allocated to. Click 'Confirm' once done.
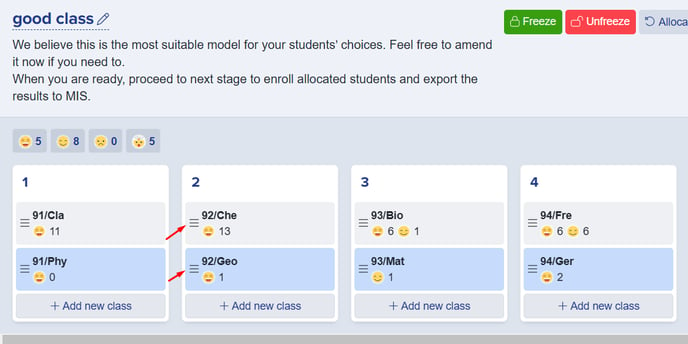
In addition to manually allocating students to classes, you can also move a class from one block to another. To do this, simply click on the icon shown below, hold, and drag the class to your preferred block. This allows for greater flexibility in adjusting the timetable to better accommodate student choices.
Emailing subject allocations home to students
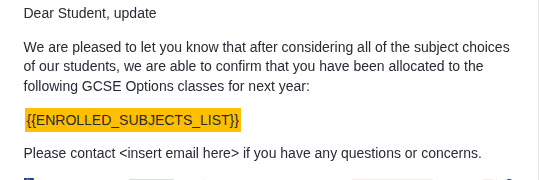
Once you are happy with your model and have moved it past the modelling stage to the final stage, an "Allocations notification" button appears in the model toolbar, next to "Export to MIS". This lets you email students the GCSE Options classes they have been allocated to.

Clicking "Allocations notification" opens a ready-made email. It is addressed automatically to every student who has been allocated to a class in this model, so you do not build the recipient list by hand. The body uses a personalisation token that fills in each student's own allocated GCSE Options classes, so every student receives a message listing only the subjects they were placed in.
The "Sending to" panel lists exactly who will receive the email, taken from the students currently allocated in the model. You can review the names and email addresses here, or choose "Download list" to export them before you send.
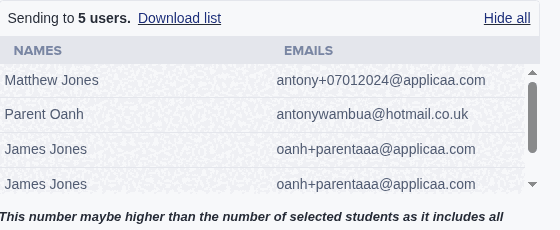
- Only students who have a class allocation in this model are included as recipients.
- Each email is personalised, so a student sees only their own allocated subjects, not the whole cohort.
- The recipient list is generated from your allocation model, not edited on the email screen.
Because the recipient list comes from the allocation model, a student is included only once they have a class allocation. To leave one student out of the email, or to add a student who is missing, adjust that student's class allocation in the model using the allocation options covered above, then reopen the "Allocations notification" email. The recipient list updates to match.
Thank you for using our guide. We hope you found it helpful.