
This article will show you how to use integration to transfer the registration/tutor groups from A+ into SIMS
Tutor Group, House and Tutor in Admissions+
In Admissions+, "tutor group", "form group" and "registration group" all refer to the same thing — the group a student is registered into. Before you can transfer these to SIMS, the groups need to exist in Admissions+, along with the member of staff (the tutor) who runs each one.
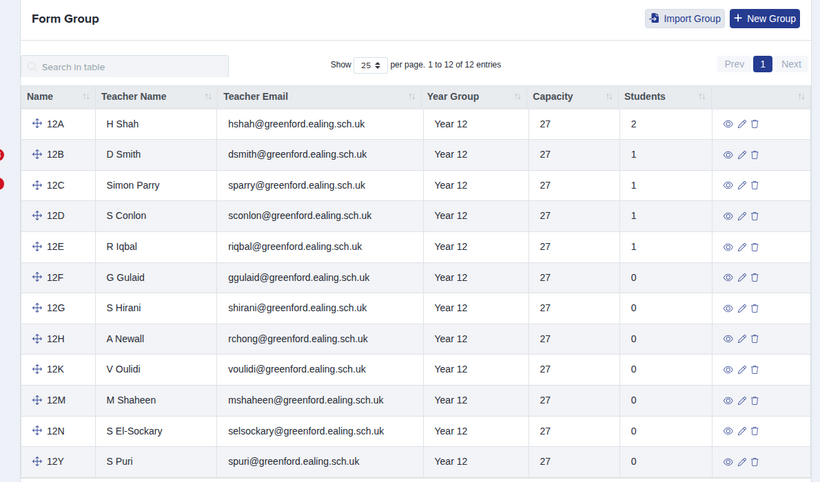
You manage your groups and their tutors under Settings > Form Settings > Form Groups. Each group shows the Teacher Name and Teacher Email (the tutor), the year group, the capacity and how many students are in it. Use New Group to add one, or Import Group to upload your existing groups in bulk.
There are three ways to get tutor group data into Admissions+:
- Allocate them with the Sorting Hat — balance new applicants into groups using your own criteria, as covered in the steps below.
- Import your existing allocations — if students are already in known groups, upload them from a CSV (see the related articles at the end).
- Sync from your MIS — if you run a SIMS or other MIS sync, the registration group comes across against each student automatically.
First of all, in SIMS, you'll need to have created your tutor groups or registration groups.
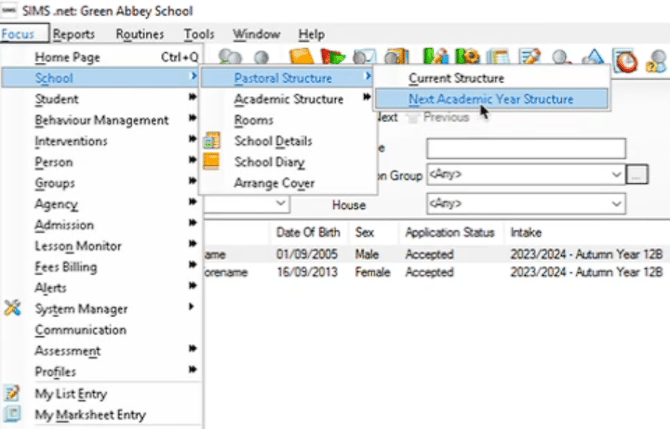
Navigate to Focus > School > Pastoral Structure and then the Next Academic Year Structure.
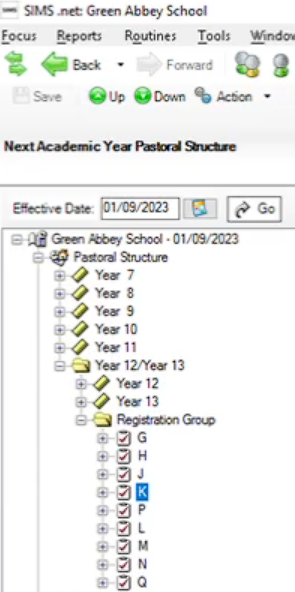
You'll then be able to go ahead and expand the Pastoral Structure then the corresponding year group. After that, expand the section for Registration Group. Here, you'll be able to create the new ones if they're not already there or you may already have them from your promotion routines.
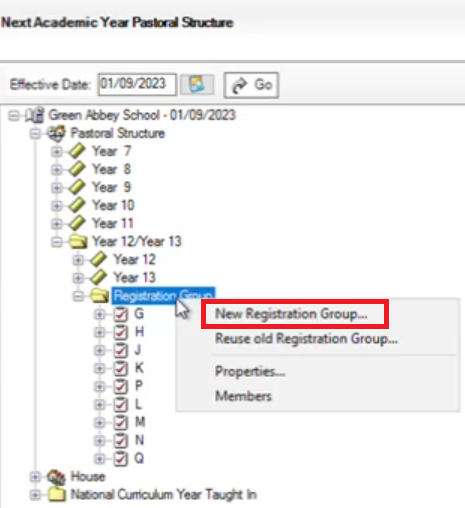
You can right-click to create a New Registration Group as well. Once you have these groups created, you will need to also mirror them on Admissions +.
On Admissions+, access Enrolment > Sorting Hat. Here, you'll need to go through the process of recreating them so that they exist in the system. Read more about how to use the Sorting Hat here.
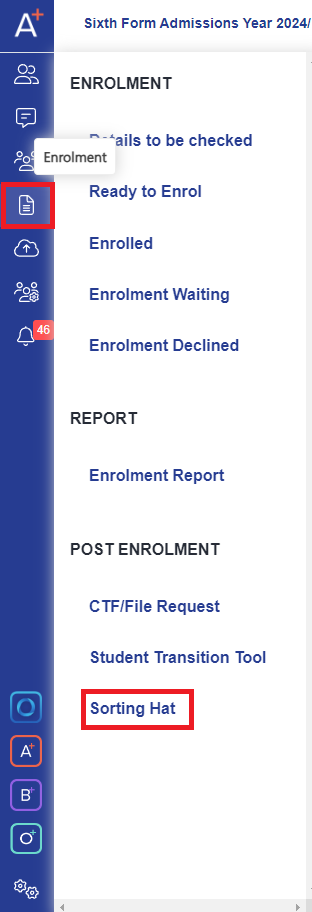
When Sorting Hat launches, you'll be able to create the name of your registration groups (use the same names as you'll use in SIMS, to make the import process smooth).
Once you've got your students into the registration groups based on your criteria, you can go ahead and import this to SIMS.
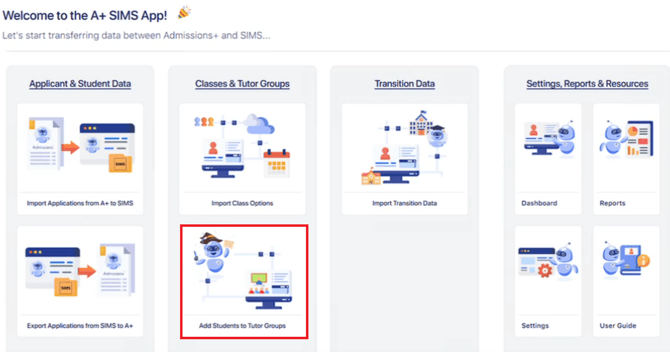
You will need to Launch the SIMS app and click on Add Students To Tutor Groups.
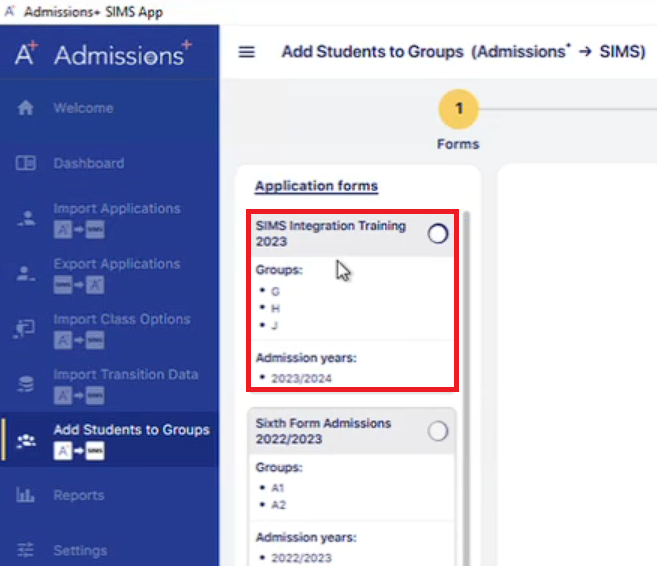
Pick a form before adding students to groups. It is going to load the students from your system who are part of this form.
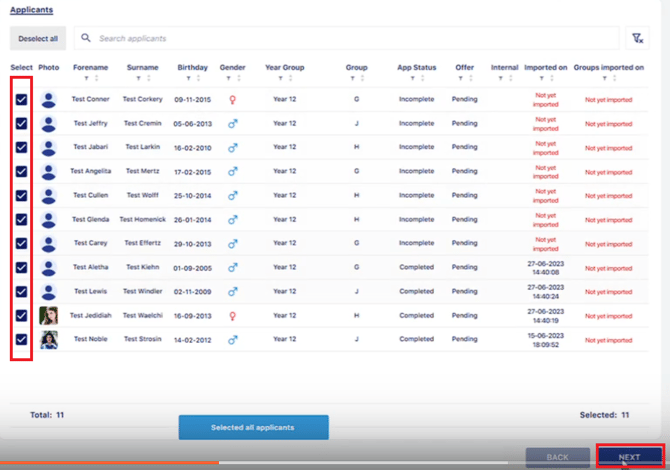
Select the students and any of the ones who have been allocated to forms and click Next.
NOTE: It's important to make sure that you have already imported these applicants into SIMS to begin with before you can do the registration groups import.
See how to import student admissions data to SIMS here.
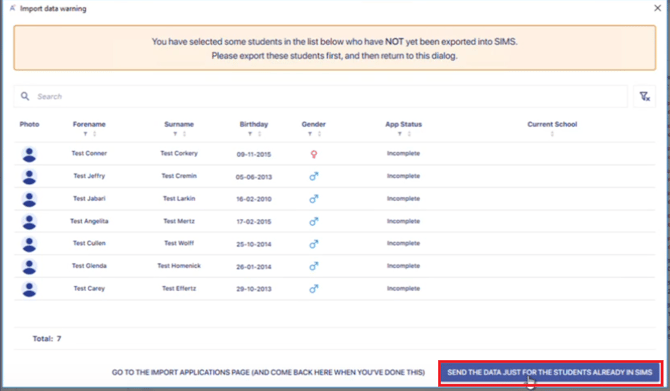
Select students who have already been imported to SIMS by clicking on Send The Data Just For The Students Already In SIMS.
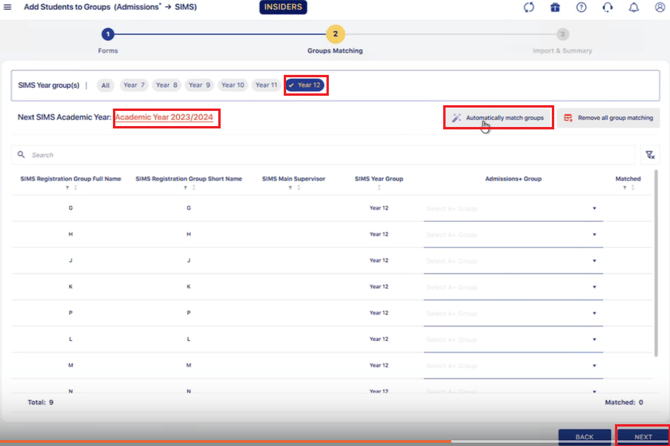
You'll then see a page where you can start to filter and match your Admissions+ form groups with your SIMS form groups. Make sure to select the correct Admissions Year and also the Year Group that you're looking at. After that, you can go ahead and click on Automatically match groups and then Next.
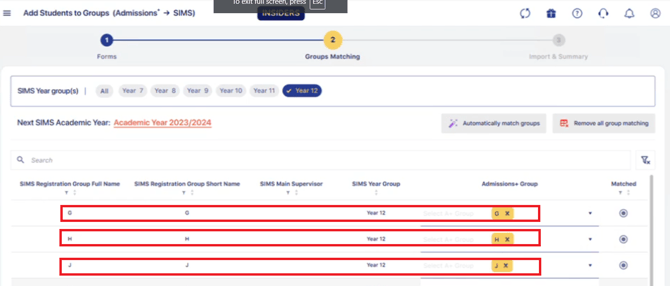
If you have given your tutor groups the same name in Admissions+, the system matches them automatically but you can also do it manually in case you've given them slightly different names.
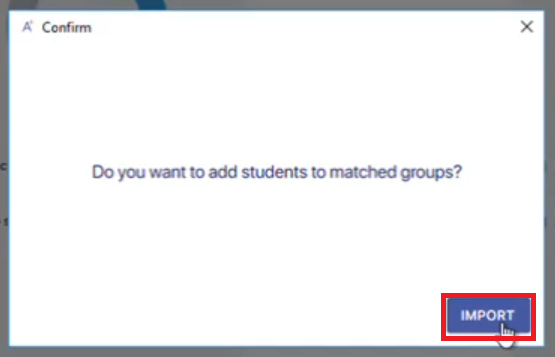
Click on Import and then it will show that the report has finished.
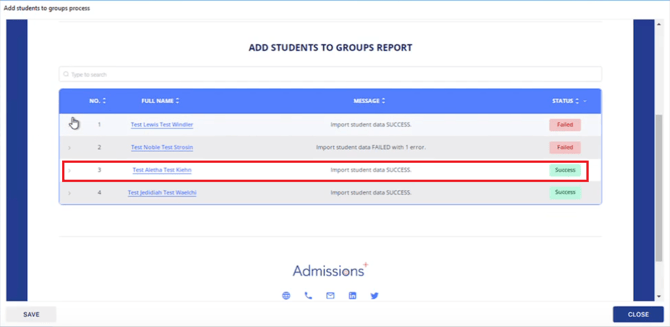
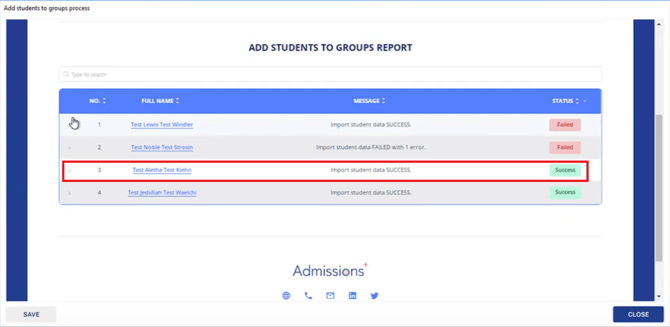
When the import is successful, you go into SIMS and will now see that the applicant is added to the registration group via the integration. This is how you can use the integration to import the tutor groups once you have allocated them with the Sorting Hat.
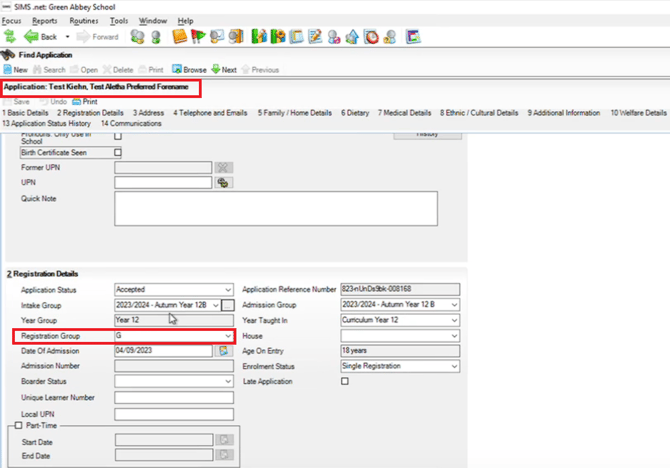
Checking which tutor group a student is in
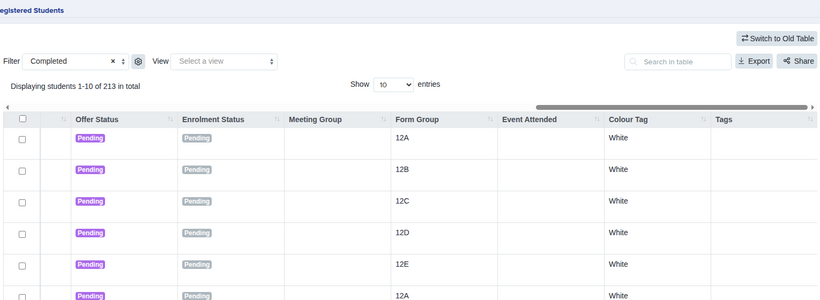
To see which tutor group your students have been allocated to, go to Registered Students and show the Form Group column. Each student's group is listed alongside them, so you can check the whole cohort at a glance.
You can also see how full each group is, and who the tutor is, on the Form Groups page under Settings > Form Settings.