
You can pull a report of who has given or refused photo consent by exporting the "Photo consent" field for a whole cohort at once. This is useful before you publish photos, send them to your MIS, or share images with third parties.
Go to Data > Export Data and click Start an Export.

Give the export a name, choose An Excel .CSV File as where you want the data, then select Students as what you want to export and continue to the field selection step.
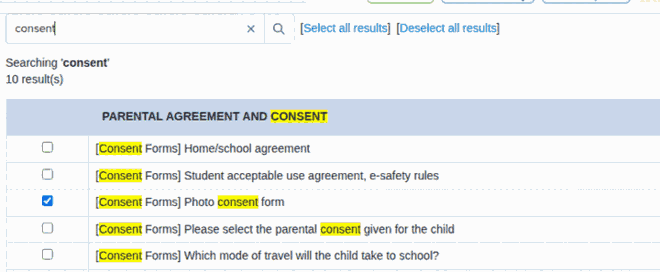
On the Field selection & configuration step, type consent into the "Search fields" box. Under Parental Agreement and Consent, tick Photo consent form so the photo consent answer is included as a column. Keep the preselected identifying fields, such as the child's name, date of birth and student code, so each row is easy to match to a student.
Choose which students to include — use Select all for the whole cohort — then move through to the Export Summary step to run the export.
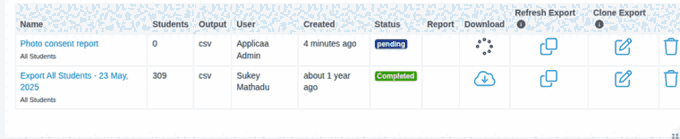
Your export appears in the list on the Export Data page. When its Status shows Completed, click the Download icon to save the CSV report of photo consent.
Good to know
- Photo consent is one of the options in the Parental Consents field, so each row shows the applicant's recorded photo consent answer.
- For a quick on-screen check instead of a download, open Registered Students, add the Parental Consents column using the table's column editor, and filter by the consent option.
- The consent options themselves are set up under Settings > Properties.