
How to remove students from a meeting if you've decided not to invite a particular student.
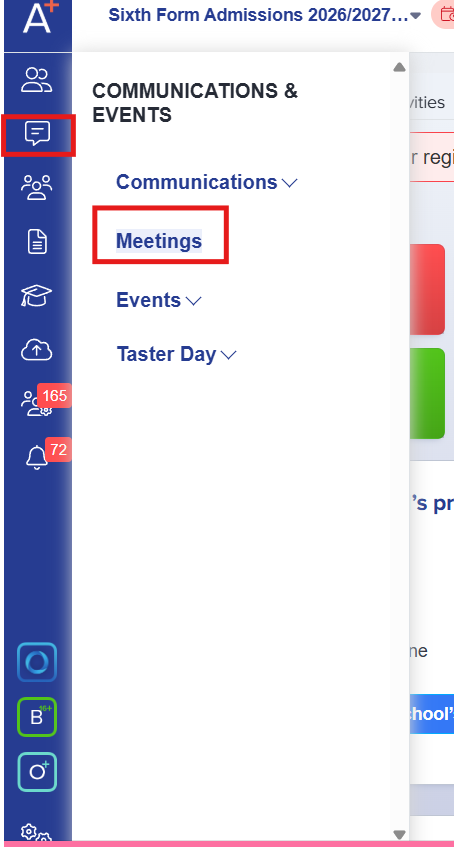
Open the meeting session that you've created by going to Communication and Events > Meetings
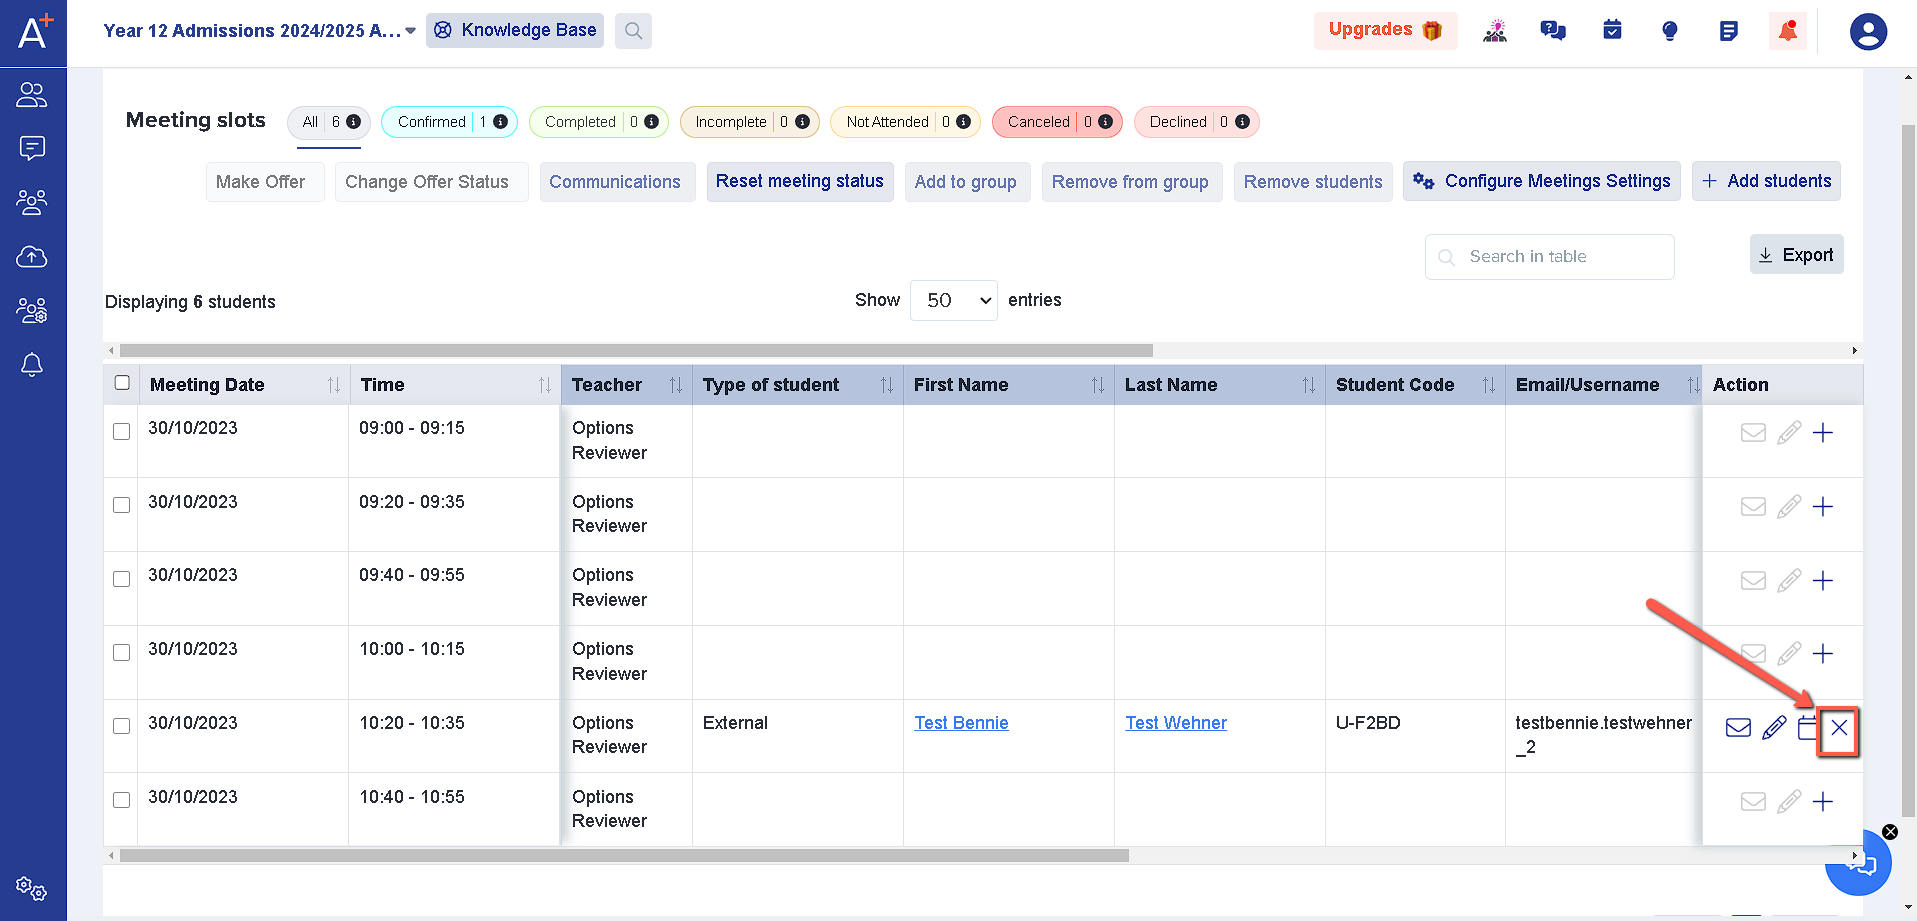
You will then see this view and if a student has been allocated to a time slot already, you may click on the "X" icon on the right-hand side of your screen. (next to the calendar icon).
Once clicked, you will see this message with the following options.
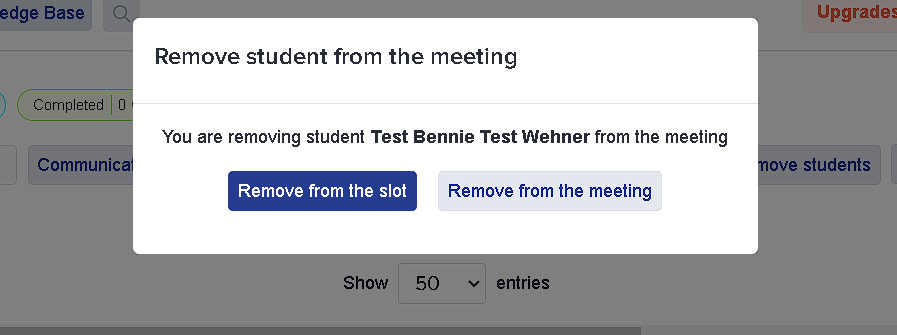
Remove from the slot means that the student will still be in the meeting and you might want to have them rescheduled for various reasons.
Remove from the meeting means that you are removing the student from the whole meeting that was set up. It could be that they have declined or will no longer proceed.
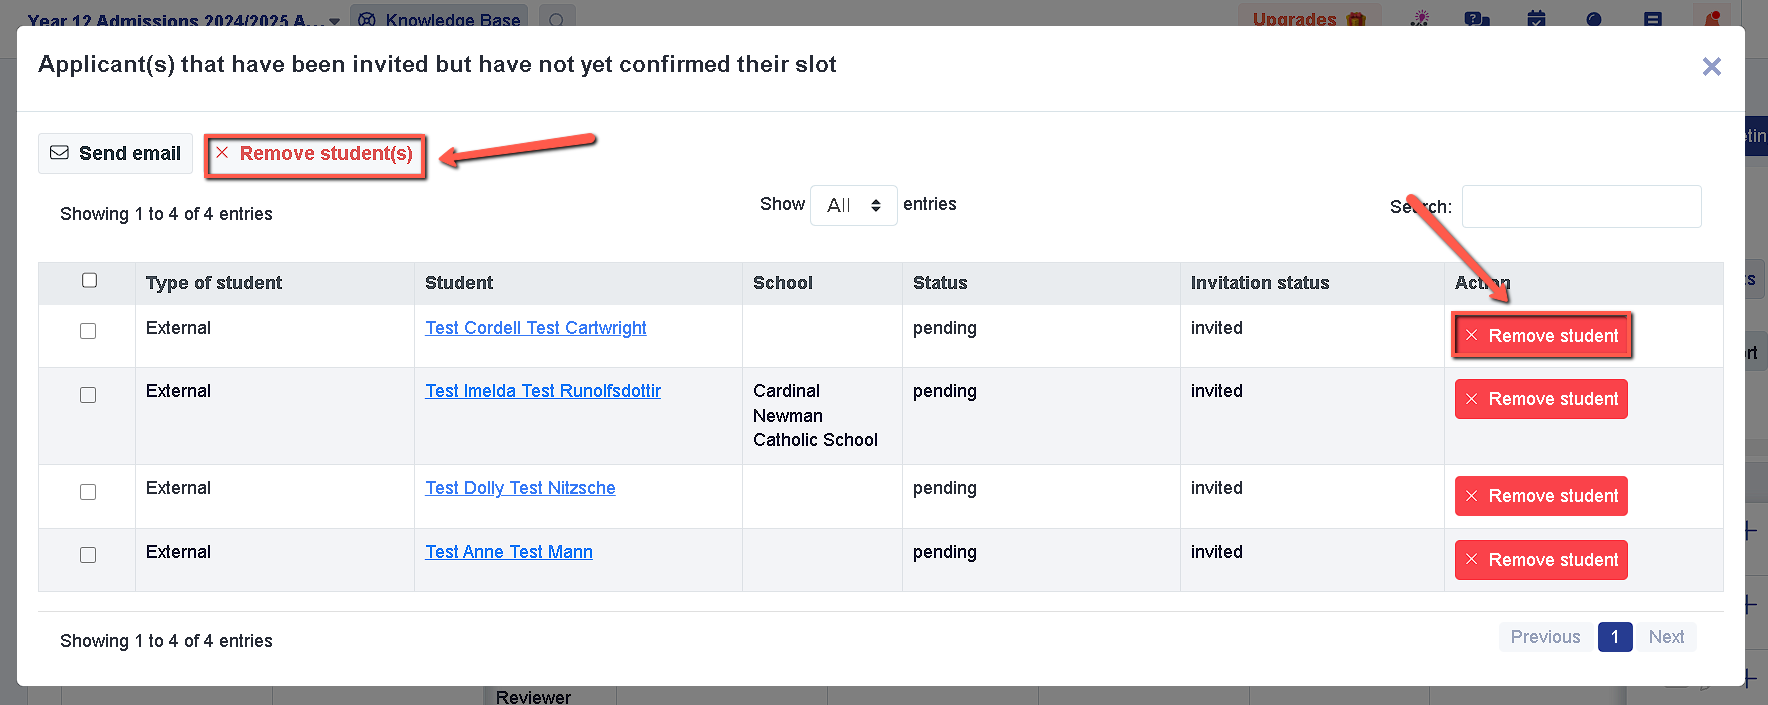
If the student was added to the meeting but was not allocated to a time slot yet, you have the option to still remove them from the meeting if needed. This can be done by clicking on the "View details" button for the pop-up below.

From there you will see this view and this is where you can remove all of the students with no allocated time slots or remove a particular student only - select them using the check boxes at the left side of the table.
Sending meeting invitations to only some of the students
If you want to email the meeting invitation to only some of the students on the list — and leave one or more of them out — you do not need to remove anyone from the meeting. You decide exactly who is emailed each time you send the invitations, so a student can stay on the meeting without receiving this particular email.
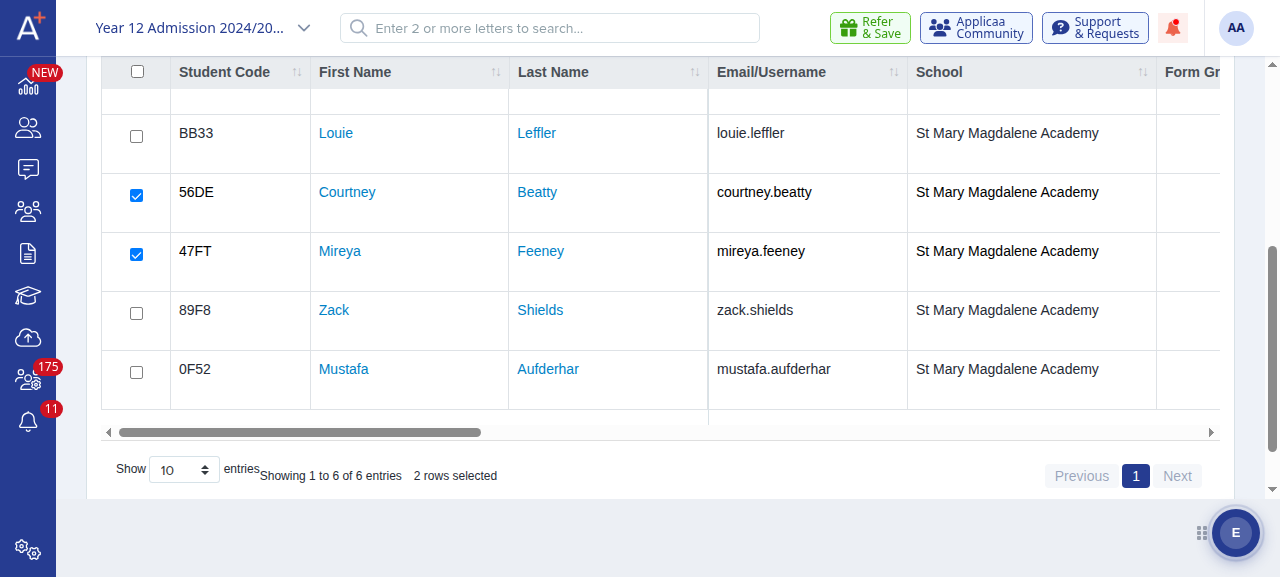
Open the meeting and go to its Candidates (Students) list, then tick the checkbox next to each student you want to email. Leave the students you want to leave out unticked. The counter at the bottom of the table confirms how many students are selected.
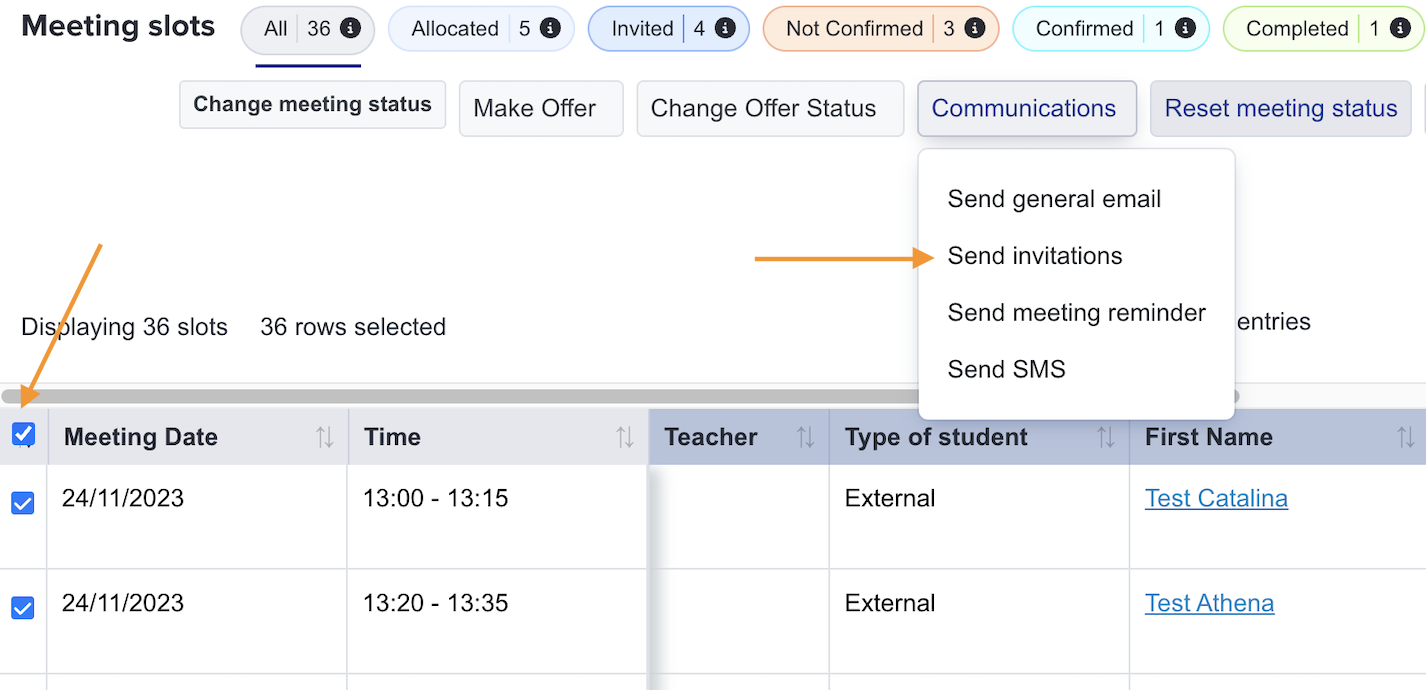
Open the Communications menu above the list and choose Send invitations. This sends only to the students you ticked.
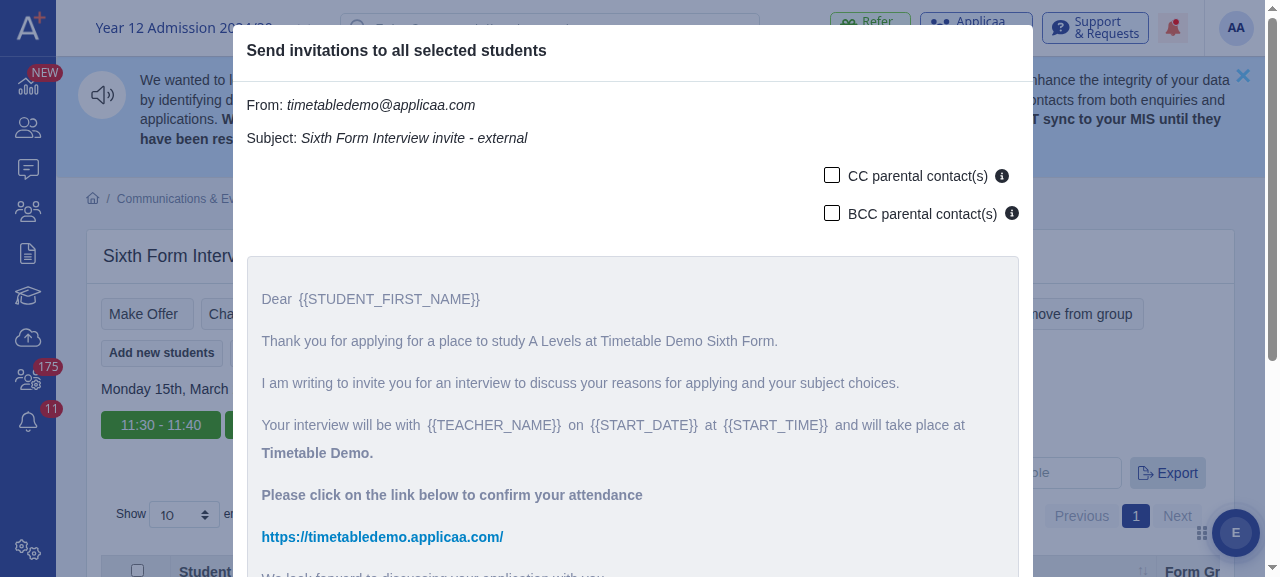
Check the sender and subject, optionally tick CC parental contact(s) or BCC parental contact(s), then click Send Invitations. Only the students you ticked receive the email — the students you left unticked are not contacted.
A few things worth knowing:
- Sending invitations resets any existing responses from the selected students, so only send to students you want to invite or re-invite.
- Any selected student whose allocated appointment slot is in the past is left out automatically, and a message on the send window tells you who was skipped.
- Use Send Invitations (no email) if you want to mark the selected students as invited without actually sending them an email.