
How It Works
Detection of Multiple Enrolments
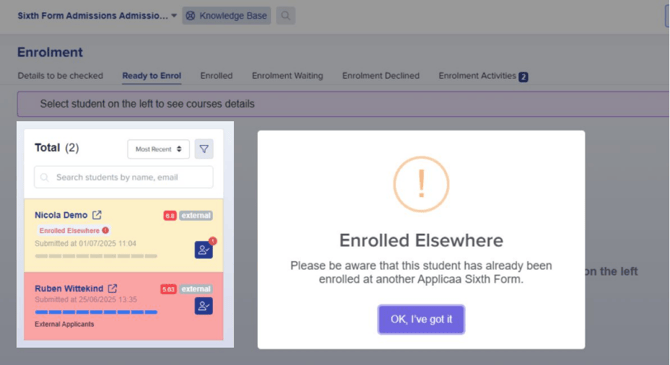
When you attempt to enrol a student who is already enrolled at another Applicaa institution, you'll see:
- A red "Enrolled elsewhere" label below the student's submitted details in the enrolment pipeline area.
- A tooltip explaining: "Based on our data, it appears that this student has already been enrolled at another Applicaa Sixth Form or College."
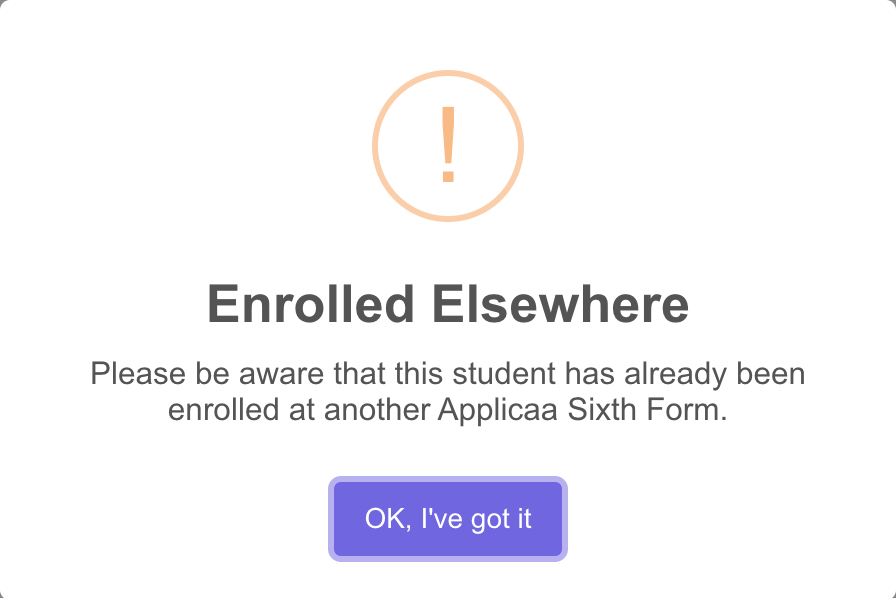
- A pop-up notification when opening the student's profile: "Please be aware that this student has been enrolled at another Applicaa Sixth Form or College."
Sending Enrolment Requests
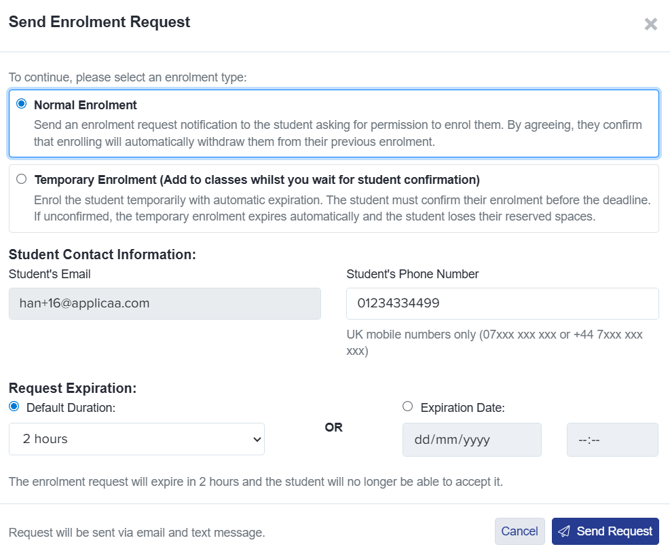
When you attempt to enrol a student who is already enrolled elsewhere, a "Send Enrolment Request" dialogue box appears with two enrolment options:
Option 1: Normal Enrolment Request
- Sends an enrolment request notification to the student asking for permission to enrol them
- By agreeing, the student confirms that enrolling will automatically withdraw them from their previous enrolment
- This is the safest option to prevent multiple enrolments
Option 2: Temporary Enrolment (reserve classes whilst you await confirmation from the student)
- Enrols the student temporarily with automatic expiration
- The student must confirm their enrolment before the deadline
- If unconfirmed, the temporary enrolment expires automatically and the student loses their reserved spaces (your class numbers are updated automatically, you receive a system notification and this is logged in the enrolment activities area)
- Useful when you want to hold spaces while awaiting student confirmation
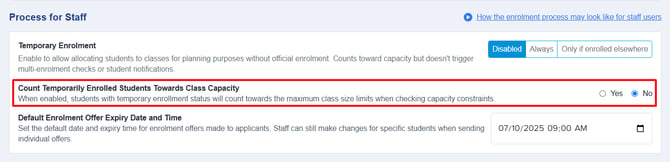
If you require all students to confirm that they want to be enrolled, you can set your system to force staff to send an enrolment offer to every student, regardless of whether they are enrolled elsewhere or not, by choosing Always. You'll find these settings in step 4 of your Enrolment Navigator.

You can also specify whether spaces are reserved when sending the request or remain unreserved.
Setting Request Details
The dialogue box fills these in for you:
- Student's Email - taken from the student's record and shown read-only. The student must have an email address on file, because the request is sent by email.
- Student's Phone Number - pre-filled from the student's record and optional. If you enter one it must be a UK mobile (07xxx xxx xxx or +44 7xxx xxx xxx), and the request is also sent by SMS. Leave it blank and the request still goes out by email on its own.
Request Expiration
Choose how long the student has to respond:
- Default Duration: Select from dropdown (e.g., 2 hours, 24 hours, etc.)
- Expiration Date: Set a specific date and time
Example: "The enrolment request will expire in 2 hours and the student will no longer be able to accept it."
Sending the Request
- The request is sent by email, and also by SMS when a mobile number is supplied
- Click "Send Request" to proceed
- Click "Cancel" to abort the enrolment
Class Capacity Protection
For students that have been offered a reserved enrolment offer (where spaces in classes were saved for them), the system includes intelligent safeguards to prevent class overfilling:
Real-time Availability Checking
When a student accepts a temporary enrolment offer, the system:
- Re-checks availability for all their chosen subjects
- Searches for any valid class combination (not just the originally-offered combination)
- Auto-allocates to the best available combination that balances class sizes
If Spaces Aren't Available
Students see a clear message:
Cannot accept place
There are no places available at this time for the offered subjects. This can happen if places were filled after your offer was made. Please contact the school if you have questions.
Students can still reject the enrolment offer at any time.
Class Allocation Settings
In Step 4 of the Enrolment Navigator (Grade Requirements section), you can configure:
"Count Temporarily Enrolled Students Towards Class Capacity"
- Default (NO): Reserved places are not counted when checking class capacity during auto-allocation
- Enabled (YES): Reserved places are included in capacity calculations, preventing over-booking
Example: If max capacity is 18 and there are 15 enrolled + 7 reserved, the system will consider the class full (22 total) when this setting is enabled.
What Happens When Students Unenroll
Notifications Sent
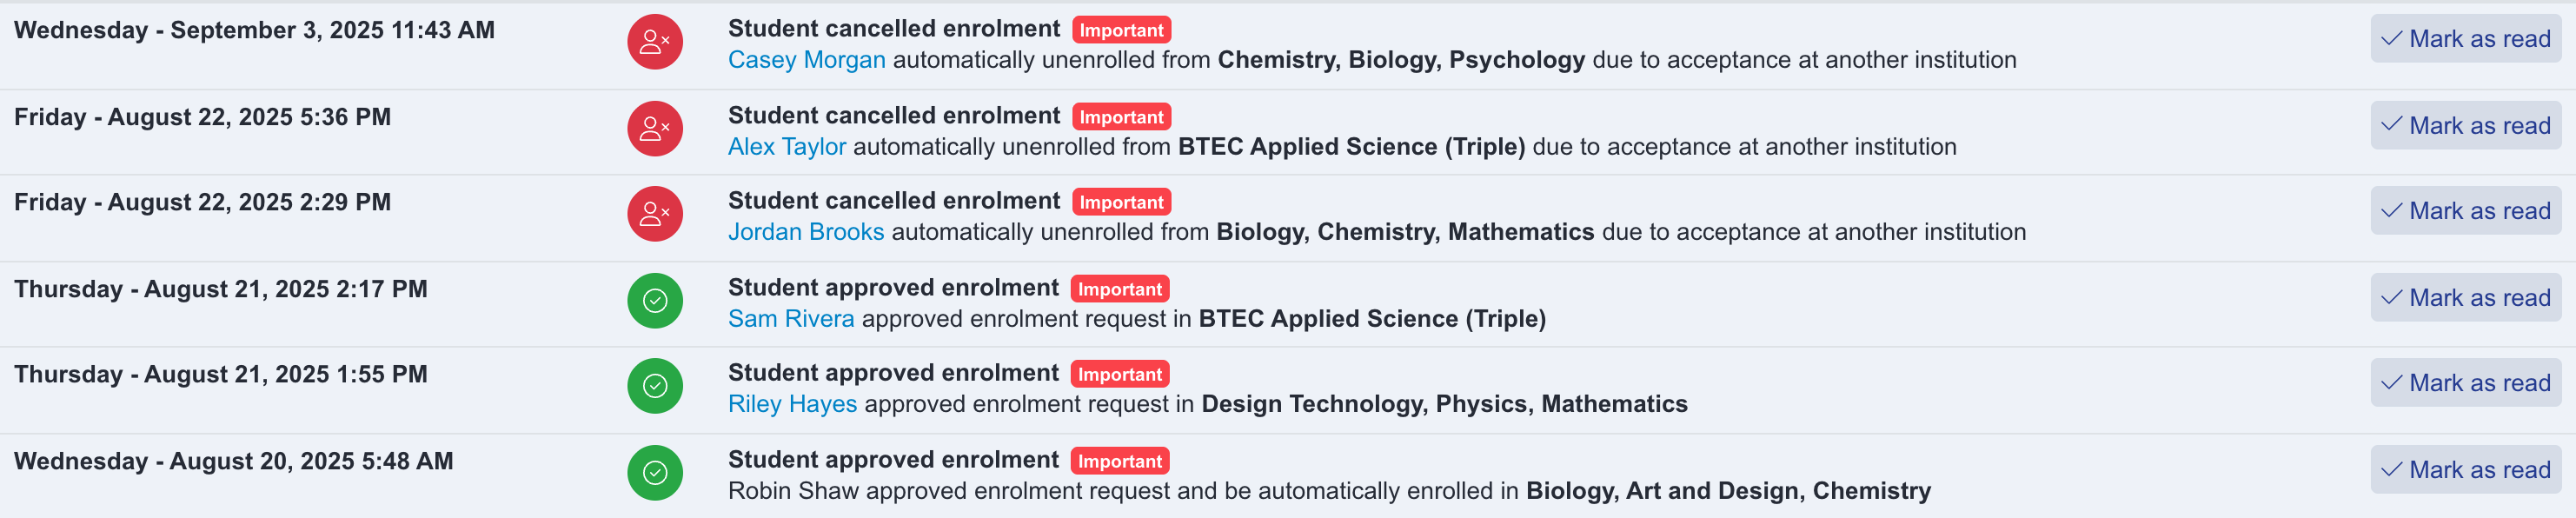
When a student unenrolls from a school to accept your offer:
-
Your school receives an email (if opted into) and a system notification: "[Student Name] has successfully unenrolled from one of their selected schools and is now eligible to be enrolled at your institution."
-
The other school receives an email: "[Student Name] has chosen to unenroll from your institution."
When a student is blocked because they're enrolled at another school
The red "Enrolled elsewhere" label is set by the system, not by your staff. Applicaa reads the student's ApplicaaOne record, sees that another Applicaa sixth form or college has already enrolled them for the current admission year, and flags them for you. Nobody at your school - and nobody at theirs - can tick or untick it, and there is no field on the student's profile that turns it off.
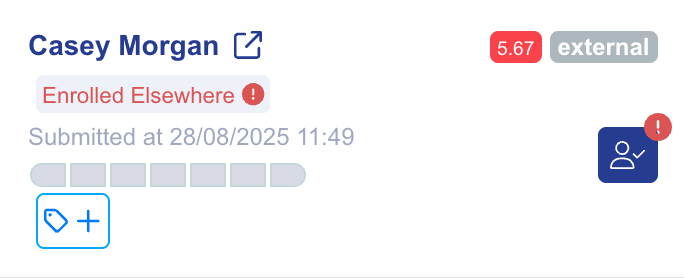
Opening that student brings up the same warning, so you know before you start why the enrolment will not go through.
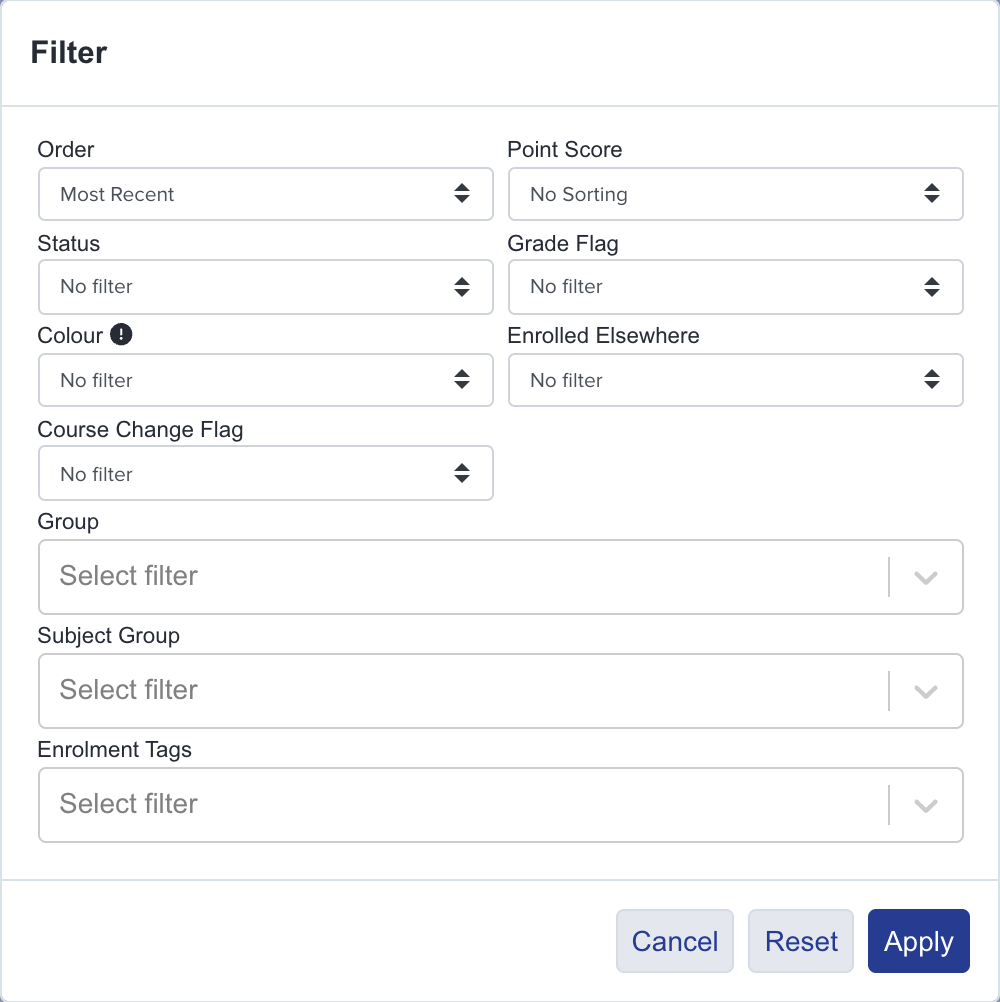
To see everyone affected at once, open the filter icon at the top of your enrolment list, set "Enrolled Elsewhere" and click "Apply".
The label clears on its own as soon as the student is no longer enrolled at the other school - there is nothing to reset afterwards.
Start by sending an enrolment request
The student's own confirmation is the route that releases them automatically. Send the enrolment request as described above; when the student accepts, Applicaa withdraws them from the other school, removes them from that school's classes, sets them to "Enrolment declined" there, emails both schools, and your enrolment goes ahead.
If the student will not confirm
If the student declines, or simply lets the request run out, Applicaa sets them to "Enrolment declined" at your school and releases any classes you reserved for them, so your class numbers go back to where they were. The student stays flagged as enrolled elsewhere, because their enrolment at the other school is untouched.
At that point the block can only be lifted at the other end, in one of two ways:
- The student signs in to their ApplicaaOne profile, opens "Manage your enrolments" and unenrols from the other school themselves.
- The other school releases them - a member of their staff opens that student in their own system and moves their enrolment status away from "Enrolled".
There is no button that lets one school release a student who is held at another school, so if the student is unresponsive you will need to contact the other school and ask them to act. Once they do, the "Enrolled elsewhere" label clears on its own and you can enrol the student normally.
If a student is leaving your school for another sixth form
When you are the school being left and the student has not been enrolled with you yet, open them in your enrolment area and click "Decline Enrolment". This frees the places you were holding and releases them for the receiving school. If you do it by mistake, the button changes to "Un-Decline Enrolment" and puts their previous status back. If the student is already enrolled with you, change their enrolment status instead.

Checking what happened
Every request you send, every acceptance, decline, expiry and automatic unenrolment is written to the "Enrolment Activities" tab of your enrolment area, so you can confirm whether a student ever responded before you chase the other school.
How Students Manage Their Enrolments
Students can log into their ApplicaaOne profile and access "Manage your enrolments" where they can:
- View all schools they're enrolled at
- See their enrolment status at each school
- Update ranking of their preferred schools
-
Respond to enrolment requests
-
Accept new enrolment requests from schools (requires typing "YES" to confirm)
- This automatically unenrolls them from existing enrolments
-
Accept new enrolment requests from schools (requires typing "YES" to confirm)
Key Benefits
✓ Prevents class overfilling through real-time availability checking
✓ Automatic class balancing when students accept offers
✓ Clear visibility of students enrolled elsewhere
✓ Flexible settings to match your school's enrolment process
✓ Automated notifications keep all parties informed
✓ Student empowerment to manage their own enrolments
Here is a video demonstrating the multi-enrolment prevention process.
Still stuck with a student who is blocked? Ask Emma in your Admissions+ system, or raise it with the helpdesk from "Support & Requests" at the top of your dashboard.