
The courses step is one of the most important steps a student will complete on their application or enrolment form. The settings in this area should always be checked to make sure students can only proceed as per your school requirements.
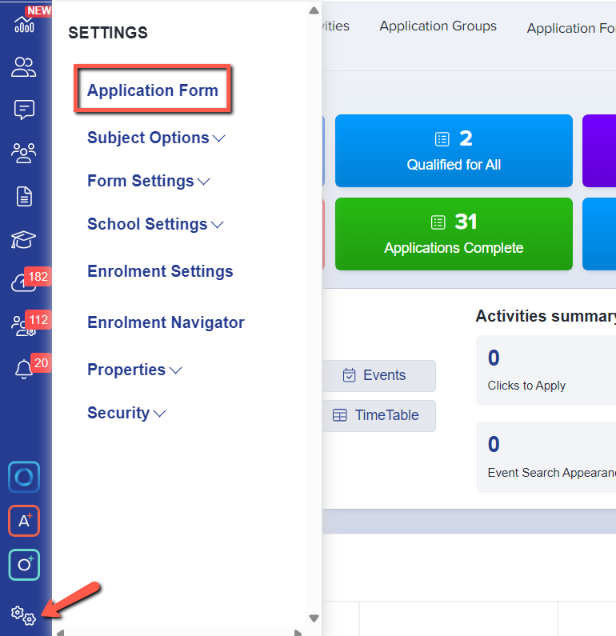
To get to the courses settings, click Settings on the lower left and then select Application Form.
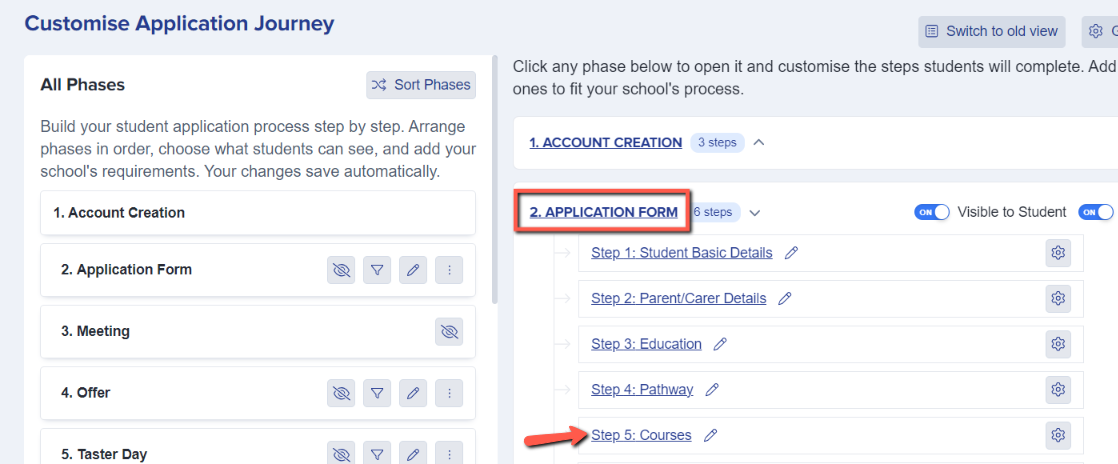
Once you are on the application form area, select the Courses step, where you can review and customise your settings.
Why can't an applicant select any courses?
If an applicant tells you they can't make any course selections, check these settings first — the cause is almost always one of them.
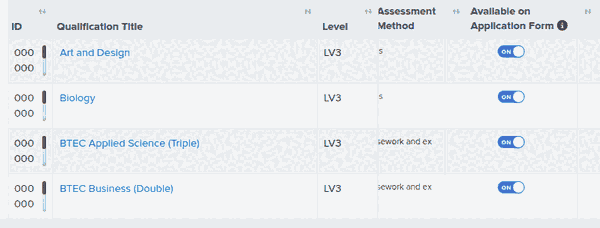
1. Make sure the courses are visible on the application form. Go to Settings, then Subject Options, and open the Subjects tab. Each course has an "Available on Application Form" toggle. If this is switched off, that course won't appear for applicants to choose, and if every course is switched off the applicant sees an empty list with nothing to select.
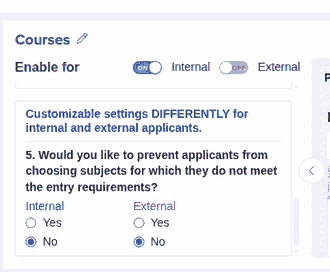
2. Check the entry-requirement restriction. On the Courses step, the setting "Would you like to prevent applicants from choosing subjects for which they do not meet the entry requirements?" decides whether grades are enforced. When it is set to Yes, an applicant can only choose courses whose entry requirements they meet — so if their predicted or achieved grades haven't been added yet, they meet no requirement and every course that has an entry requirement becomes unselectable. Either set this to No, or make sure the applicant's grades have been imported or entered, so they can make their choices.
If you want applicants to be able to express an interest in any course regardless of their grades, choose "Restrict enrolment by teachers" instead. Applicants can then select any course, and staff decide which courses they qualify for at the enrolment stage.
A few other settings can also leave an applicant with nothing to select:
- The Courses step is switched off for that applicant type — check the "Enable for Internal / External" toggle at the top of the Courses step, as it can be on for one type of applicant but off for the other.
- The applicant is on a Pathway that limits them to a specific set of courses, or excludes the ones they expected to see.
- A course is a follow-on (dependent) subject whose prerequisite hasn't been selected yet, so it stays locked until the required subject is chosen.
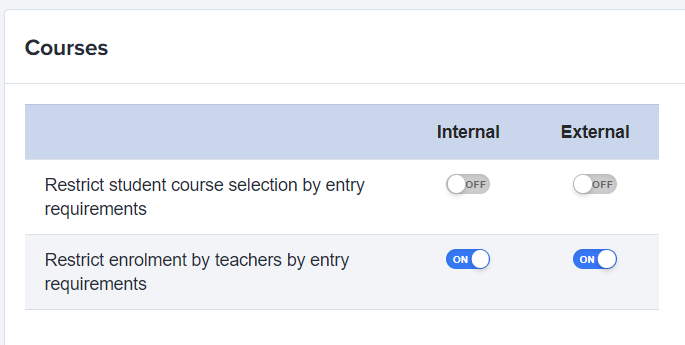
Restricting student course selection by entry requirement means that if they don't meet the entry requirements you have specified, the student won't be allowed to choose that particular course.
Many schools still want to see what students are interested in studying, and opt instead to restrict their enrolment by teachers. This means students can express an interest in any course, but staff involved in the enrolment process can only enrol them into courses for which they qualify.
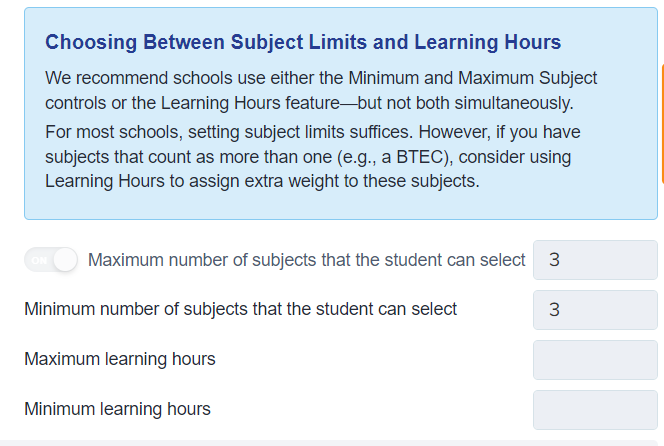
You can limit the number of choices an applicant is able to make; either by the number of subjects or by the number of learning hours. You would make use of the Learning Hours options if you offer courses which are worth double or triple a single A Level or equivalent.
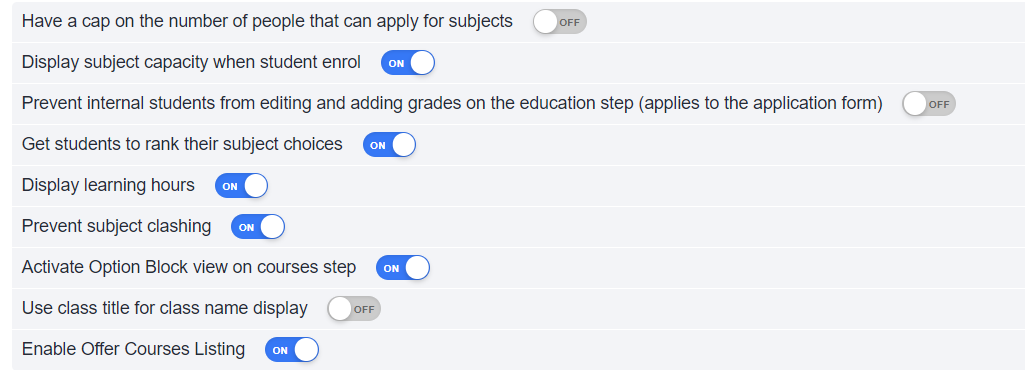
You can choose which other settings to have in place; do you need to cap the number of places on a course at the application stage? Do you want applicants to see the capacity for each of their chosen courses on results day?
If you want to import the predicted and/or achieved results for your internal applicants, you can do so via the imports area of the platform. Here, you can choose to prevent the internal applicants from editing the grades you add in on their behalf, so they can't make any cheeky changes!
You can also ask applicants to rank their subjects in order of preference when applying, and can also enable them to see the learning hours for each course — this is completely up to you.
If you are using the Learning Hours settings described above, you would need to have "display learning hours" active.
Prevent Subject Clashing and Activate Option Block View are two settings which go hand in hand; generally they are either both on, or both off.
If you have given your subjects and classes different names, use the "use class title for class name display" option to toggle between the two, and decide which view you'd prefer the students to see.
Enable Offer Courses Listing would allow you to use the offer courses list on a student's profile, to generate a list of courses you wish to make them an offer to study. The offer list is often used in conjunction with the meetings area of the platform and allows you and students to differentiate between application choices & offered subjects.
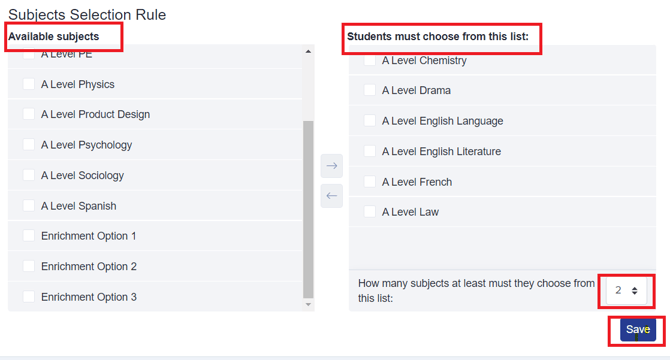
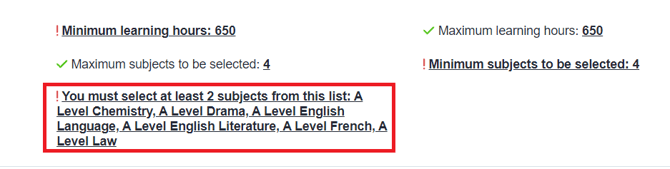
The 'Subject Selection Rule' allows you to define the number of subjects that an applicant can select from a specific list that you have made, or enforce a specific choice (for example, if you need them all to select "Supervised Study", you can define that in this list).
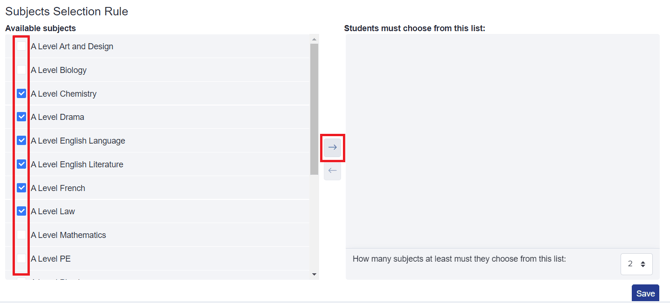
Prepare your list by putting a tick on the subjects you need under the 'Available Subjects' column and then click Arrow Right. The subjects will now have moved to the right column labelled 'Students must choose from this list:'. After that, indicate the number of subjects that the students must choose from your list then click "Save".
This area enables students to choose reserve subject(s), and you can set a minimum and maximum number of reserved subjects as needed.
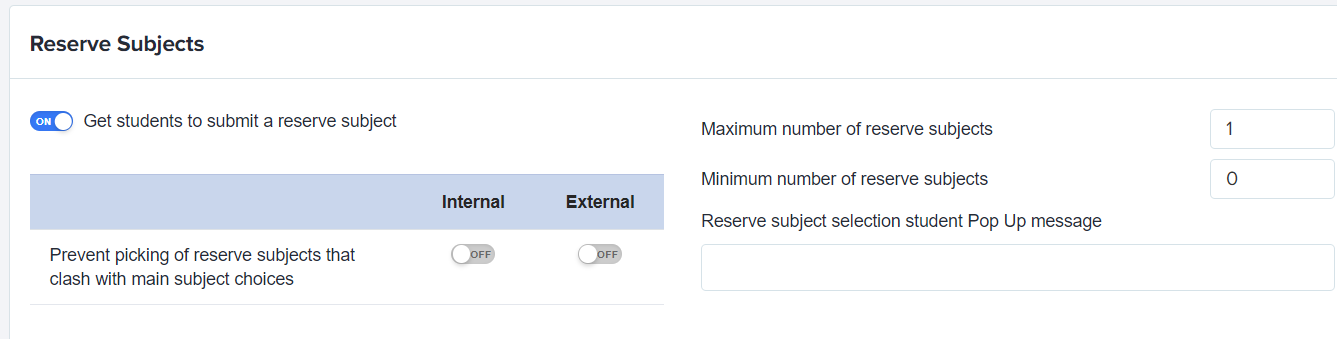
Students select their main choices first and once those are selected, a pop-up will then appear to prompt them to select their reserve choice(s) if these settings are active.